I can provide you with a general guide on how to make an oval crochet box, likely similar to what would be taught in a “master class” due to its detailed nature. However, a true “master class” would involve specific patterns, potentially unique techniques, and visual demonstrations, which I cannot fully replicate here.
To provide you with the most helpful and detailed information, I will assume you are familiar with basic crochet stitches (slip stitch, single crochet, double crochet) and are looking for guidance on shaping, constructing, and potentially finishing an oval box.
Here’s a detailed guide:
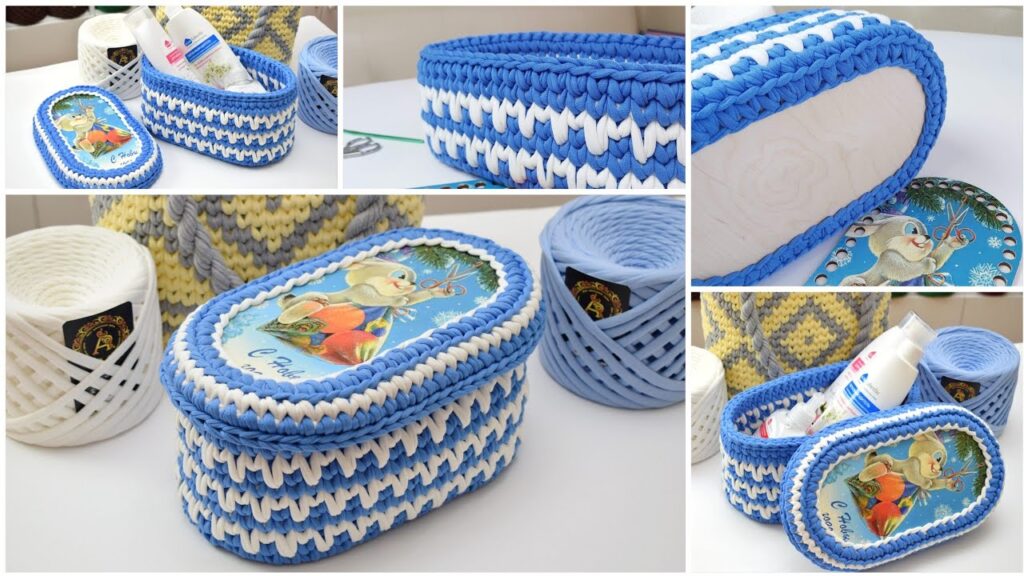
How to Make an Oval Crochet Box (Master Class Style)
Making an oval crochet box involves understanding shaping, tension, and structure to create a sturdy and aesthetically pleasing container. This guide will walk you through the process, from choosing your materials to adding finishing touches.
1. Essential Materials
- Yarn:
- For a Sturdy Box: Cotton or T-shirt yarn (zpagetti) are excellent choices due to their lack of stretch and good stitch definition. Thicker yarns will yield a sturdier box.
- For a Softer Box: Acrylic or wool can be used, but the box will be less rigid. You might need to reinforce it later.
- Weight: Consider a worsted weight (4) or bulky (5) for a good size.
- Crochet Hook: Choose a hook size appropriate for your chosen yarn. Refer to the yarn label for recommendations. A slightly smaller hook than recommended can create a tighter fabric, which is good for a sturdy box.
- Stitch Markers: Essential for keeping track of your rounds, especially when working in a spiral.
- Tapestry Needle: For weaving in ends.
- Scissors: For cutting yarn.
- Optional:
- Plastic Canvas/Cardboard: For reinforcing the base and/or sides if you want a very rigid box.
- Fabric for Lining: If you want a finished interior.
2. Understanding Oval Shaping in Crochet
An oval base is typically created by working around a chain, increasing at the ends. The key is to maintain a flat base without curling or buckling.
3. Step-by-Step Construction
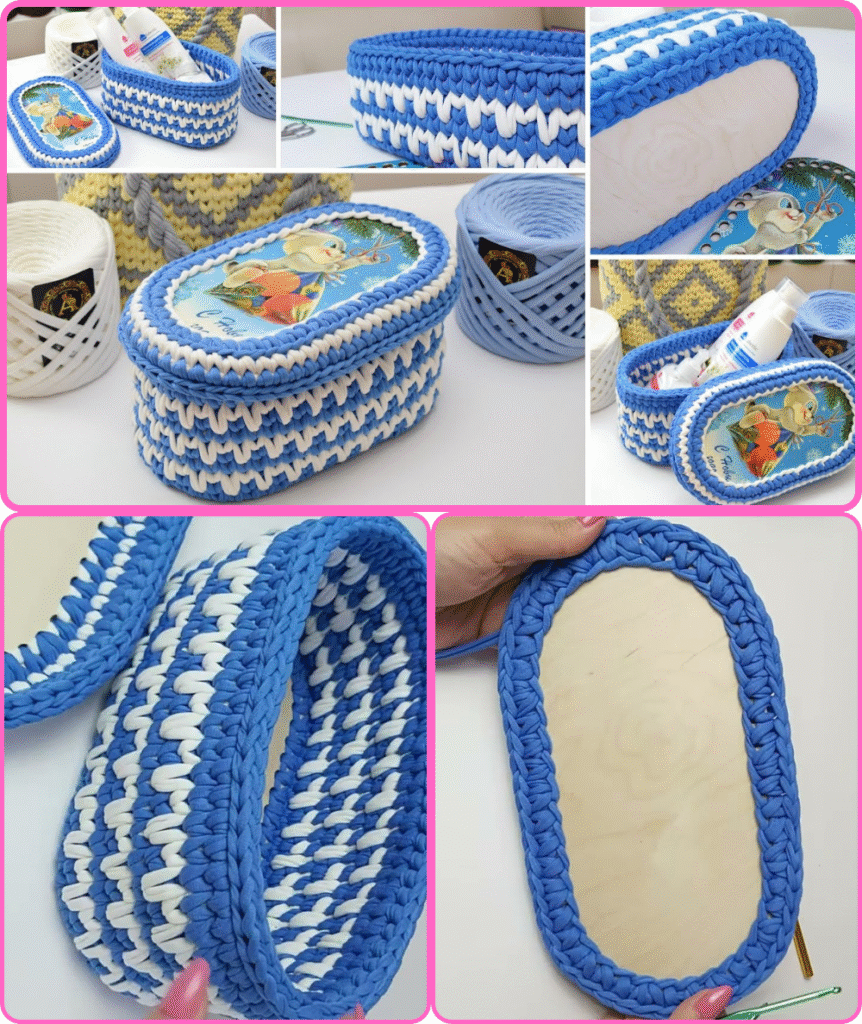
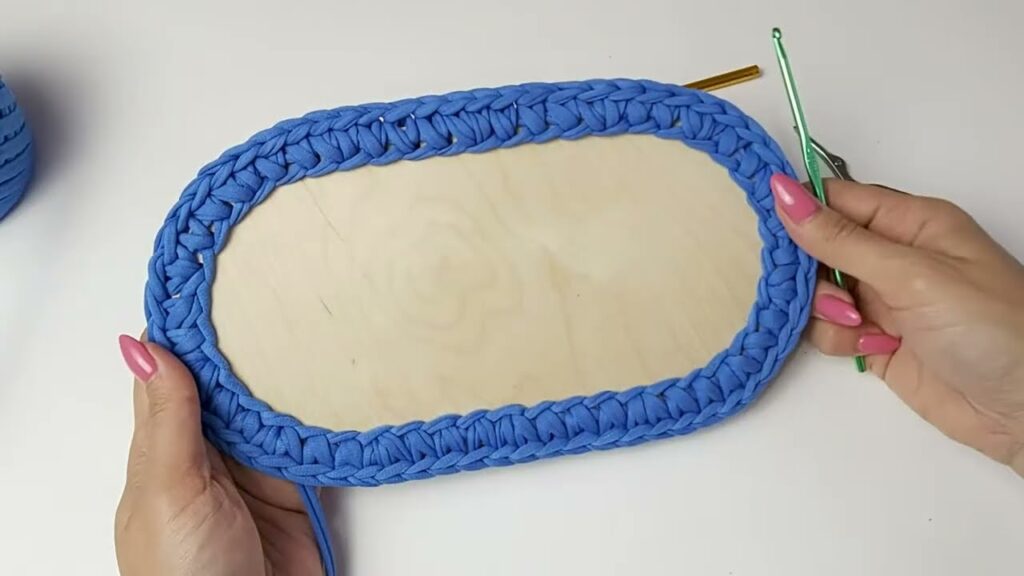
Part 1: The Oval Base
Goal: Create a flat, sturdy oval. Single crochet (sc) is usually the preferred stitch for the base due to its density.
- Ch (Chain): Start with an even number of chains. This will determine the length of your oval. For a medium box, start with 15-25 chains.
- Example: If you chain 20, your “straight” sides will be 18 stitches long, and the ends will be worked around the last chain.
- Round 1:
- Sc in the 2nd ch from the hook.
- Sc in each chain across until you reach the last chain.
- In the last chain, work 3 sc (this creates the curve around one end).
- Now, you’ll be working down the other side of your starting chain. Sc in each chain across.
- In the last chain (the one where you started your first sc), work 2 sc (to complete the curve on the other end). Join with a sl st to the first sc of the round.
- Alternative (working in a spiral): Instead of joining, simply place a stitch marker in the first sc of the round and continue. This avoids a visible seam.
- Round 2 (and subsequent increase rounds for the base):
- Ch 1 (does not count as a stitch).
- Sc in each sc until you reach the increases at the end of the oval.
- At each end: You will typically work 2 sc in each of the 3 stitches from the previous round’s increase (for a total of 6 stitches at each end). This is a common method for creating a smooth oval.
- Continue sc in each sc along the straight side.
- Repeat the increase at the other end.
- Join with a sl st or continue in a spiral.
- Continuing Base Increases: Repeat Round 2 or similar increase patterns until your base reaches the desired size.
- Important Note on Increases: The number of stitches you increase at each end will depend on how quickly you want your oval to widen. For a very flat oval, you’ll typically increase 6 stitches per round (3 at each end). Ensure your increases are evenly spaced to avoid a lumpy or ruffled base.
- Pro Tip: If your base starts to curl up, you’re not increasing enough. If it’s ruffling, you’re increasing too much. Adjust accordingly.
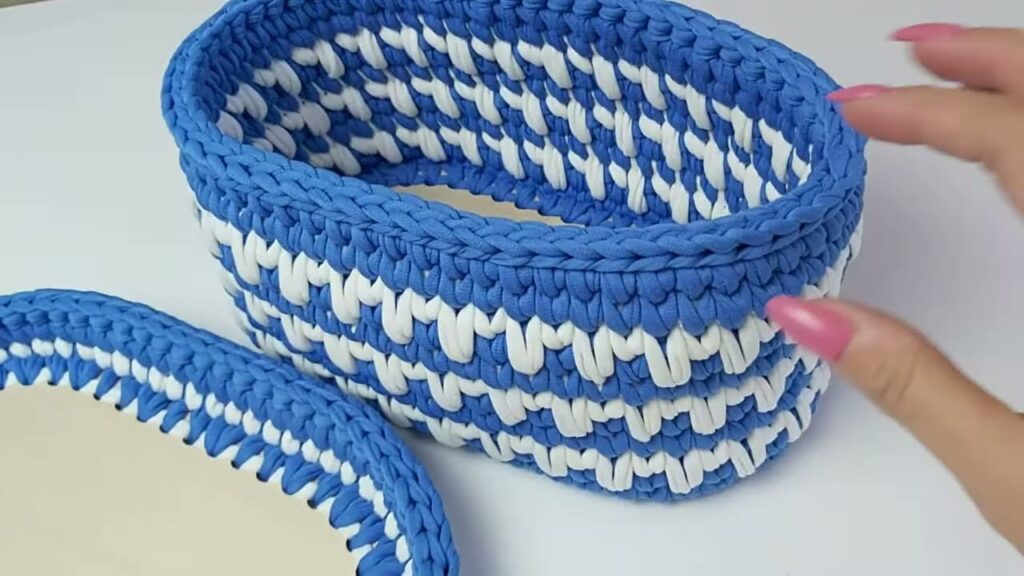
Part 2: Building the Sides
Goal: Create vertical walls for your box. This is where you stop increasing.
- First Side Round (Establishing the Wall):
- Ch 1.
- Work a round of single crochet in the back loop only (BLO) or third loop (camel stitch) of each stitch around. This creates a distinct ridge that helps the side of the box stand up straight.
- BLO: Creates a defined edge.
- Third Loop (Camel Stitch – for hdc base): If your base was made of half double crochet, working into the third loop of the hdc stitch creates a nice ribbed effect on the outside and pushes the top of the stitch forward, giving a clean edge. For an sc base, BLO is the standard.
- Do not join at the end of this round if you are continuing in a spiral. Place a stitch marker.
- Subsequent Side Rounds:
- Continue working single crochet (or your desired stitch) in both loops of each stitch, working in continuous rounds (spiral) for a seamless look.
- Maintain consistent tension to ensure straight, even walls.
- Stitch Choice for Sides:
- Single Crochet (sc): Most common for sturdy boxes. Creates a dense fabric.
- Half Double Crochet (hdc): Faster, but can be slightly less rigid than sc.
- Double Crochet (dc): Fastest, but will create a looser, less structured box unless yarn is very thick.
- Height: Continue crocheting rounds until your box reaches the desired height.
Part 3: Finishing the Top Edge (Optional but Recommended)
Once you reach the desired height, a neat finish can make your box look professional.
- Slip Stitch Round: Work a round of slip stitches around the top edge. This creates a firm, clean finish and prevents stretching.
- Reverse Single Crochet (Crab Stitch): For an even more defined and decorative edge, work a round of reverse single crochet (working sc from left to right for right-handed crocheters).
Part 4: Adding Structure and Reinforcement (Optional)
For a truly “master class” box, consider these steps for extra sturdiness:
- Base Reinforcement:
- Cut a piece of plastic canvas or sturdy cardboard to the exact size and shape of your finished crochet base.
- Insert it into the bottom of the box before you finish the top edge or after. You can secure it with a few stitches if desired.
- Side Reinforcement (Less Common but Possible):
- You can cut strips of plastic canvas and sew them along the inside of the walls. This is more involved and usually only necessary for very large or heavy-duty boxes.
- Lining:
- Cut fabric to fit the inside of your box (base and sides).
- Hem the top edge of the fabric.
- Sew the fabric lining into the box by hand, using a whip stitch along the top edge of your crochet box.
4. Tips for a “Master Class” Finish
- Consistent Tension: This is the most crucial element. Practice maintaining even tension throughout your project to avoid wavy edges or lopsided walls.
- Invisible Joins (if not working in spiral): If you are joining rounds, learn an invisible join technique to minimize the seam line.
- Weave in Ends Neatly: Don’t just snip! Use a tapestry needle to weave in all yarn tails securely into the fabric of your stitches.
- Blocking (Optional): While less common for rigid boxes, if your yarn allows, wet blocking can help even out stitches and ensure the box maintains its shape. For a crochet box, steam blocking might be more appropriate to gently shape it.
- Practice Curves: The key to a good oval is understanding how increases create a smooth curve. Practice on small swatches if unsure.
- Read Your Stitches: Learn to identify your stitches and where to insert your hook. This prevents missed stitches or accidental increases/decreases.
By following these detailed steps and paying attention to tension and shaping, you can create a beautiful and sturdy oval crochet box that looks like it came from a master class! Good luck!
Watch video:
Comments
Post a Comment