Here’s a detailed explanation of how to make an easy crochet Deni bag, which you can use as a guide for creating a video tutorial or simply follow to make the bag yourself. The Deni bag is known for its simple construction, elegant look, and practicality. This guide will walk you through everything from materials to finishing touches.
 Easy Crochet Pattern: Beautiful Deni Bag Tutorial
 Overview
This easy crochet bag pattern is beginner-friendly, stylish, and versatile. You’ll use basic stitches to create a sturdy rectangular base, build up the body, and finish with handles. Perfect for everyday use or as a handmade gift.
 Video Tutorial Structure (for YouTube or Reels)
 Intro (0:00–0:30)
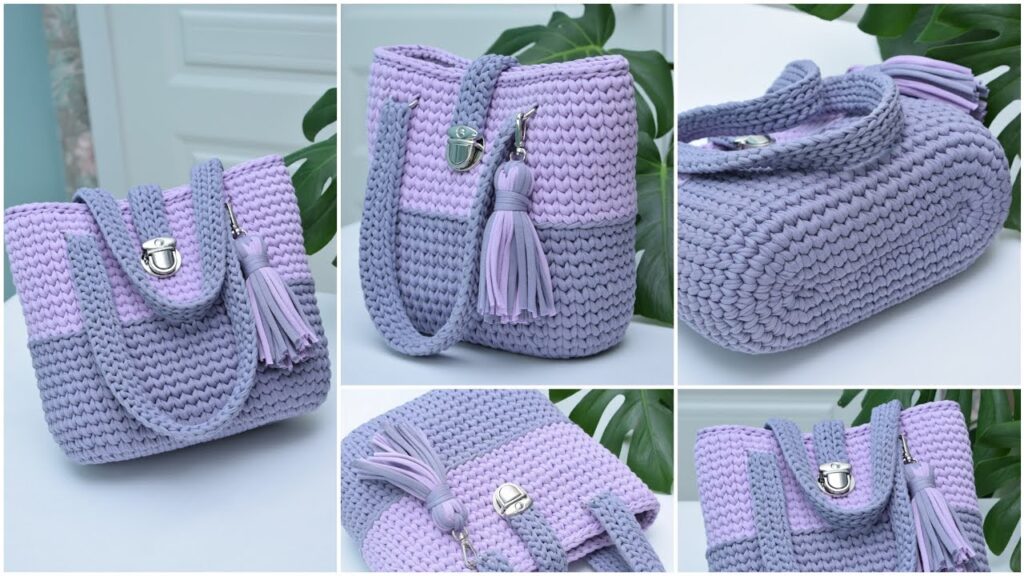
- Show a finished Deni bag.
- Mention the level (Beginner-friendly).
- Display a list of required materials.
 Materials Needed
| Item | Description |
|---|---|
| Yarn | Cotton or poly-blend yarn (medium-weight, e.g. size 4) |
| Crochet hook | 4.0mm–5.0mm (check yarn label) |
| Scissors | For trimming yarn |
| Yarn needle | For weaving ends |
| Stitch markers | Optional, to mark rounds |
| Magnetic clasp or zipper | Optional, for closure |
| Lining fabric | Optional, for durability |
 Pattern Instructions
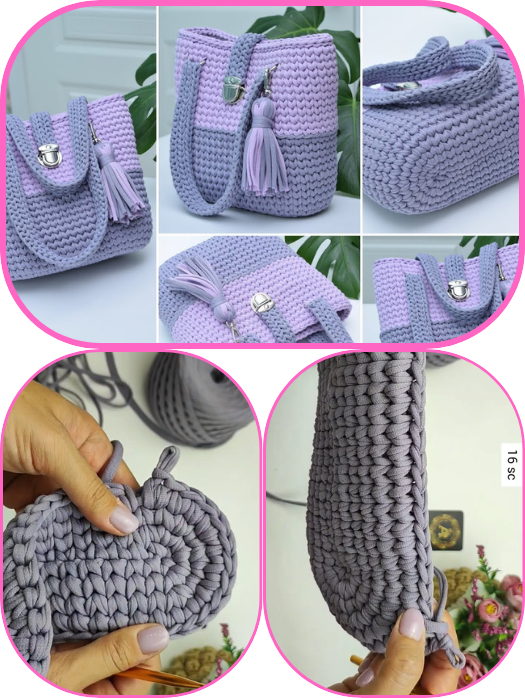
1. Base of the Bag
- Start with a foundation chain of 31 chains (or desired width).
- Row 1: SC (single crochet) into the 2nd chain from hook and across (30 stitches). CH 1, turn.
- Rows 2–8: SC across. CH 1, turn. (This makes a sturdy rectangular base.)
- Adjust rows to make it as long as you like.
Video Tip: Show close-up of base rows and explain tension control.
2. Body of the Bag (Working in the Round)
- Start Rounds: SC all around the base rectangle—work 1 SC in each stitch on the long sides and place 2–3 SC in each corner for smooth turning.
- Continue in the round: Place a stitch marker to track rounds.
- Next Rounds: SC in each stitch around for 25–30 rounds (depending on how tall you want the bag).
 Optional: Add a simple textured stitch like alternating SC and DC for a unique look.
Video Tip: Show how to count stitches and keep the edges even.
3. Handles (Straps)
- Decide placement (e.g., 8 stitches from each side).
- Row 1: SC until handle placement, CH 35 (or desired length), skip same number of stitches on the bag, attach to next stitch with SC.
- Repeat for second handle.
- Work 1–2 more SC rounds to reinforce strap base.
Video Tip: Explain how to adjust strap length and how to reinforce with extra rows.
4. Finishing Touches
- Weave in all ends with yarn needle.
- Optionally sew in lining fabric for durability.
- Add a magnetic clasp or zipper for closure.
Video Tip: Show how to neatly weave in ends and attach lining with basic sewing.
 Final Result
A beautiful, sturdy Deni crochet bag that you can customize in size, color, and texture!
Video Ending (Last 30 sec)
- Showcase the finished bag from different angles.
- Suggest color combos and possible variations (e.g., crossbody strap, tote-style).
- Invite viewers to subscribe and tag their creations.
 Extra Tips
- Try color blocking: change yarn color every 10 rows.
- Use jute or raffia yarn for a summer beach bag look.
- Block your bag (steam or wet) for cleaner shape.
Watch video:
Comments
Post a Comment