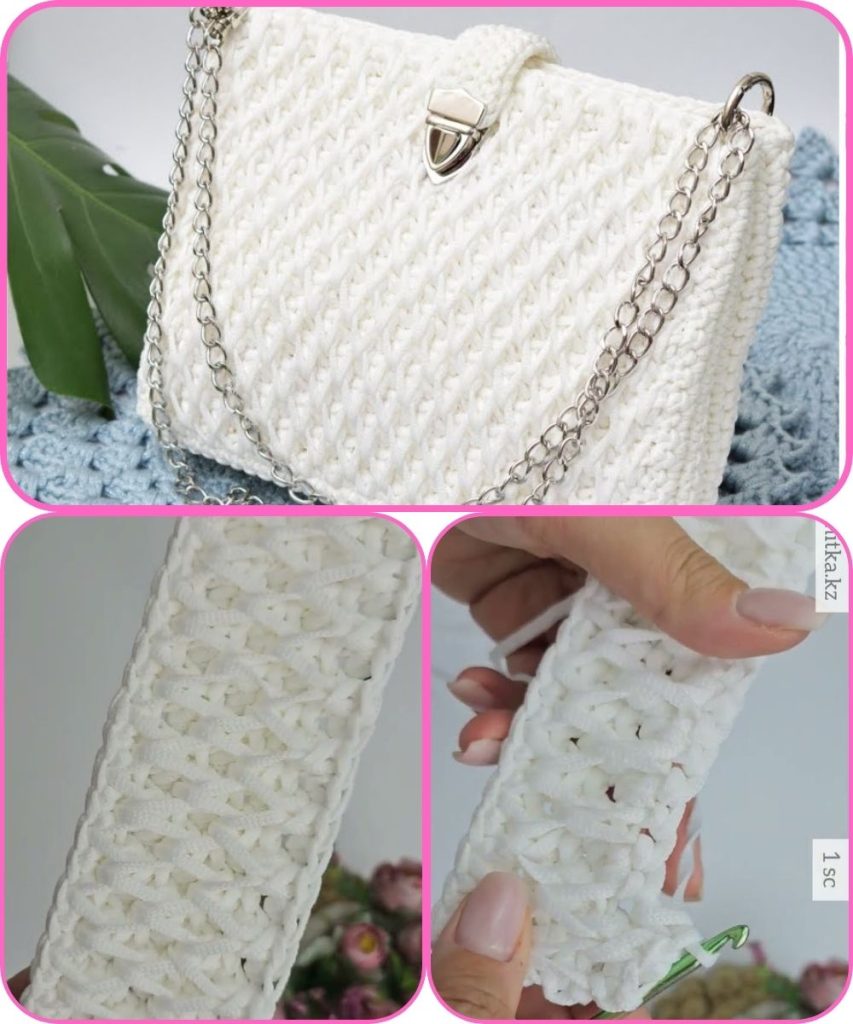
Sure! Crocheting a bag made of polyester cord with a honeycomb pattern is a stylish and sturdy project. Here’s a detailed step-by-step guide, including what materials you need, how to prepare, and how to execute the honeycomb pattern in crochet. This guide is suited for someone with intermediate crochet skills.
 Project: Honeycomb Pattern Crochet Bag Using Polyester Cord
 Materials Needed:
- Polyester cord (3-5 mm thick)
– Amount: approx. 200-300 meters depending on bag size
– Color of your choice
– Polyester cord is great for structure and durability. - Crochet Hook – Size depends on cord thickness (usually 5–7 mm hook).
- Stitch markers – To keep track of your rounds/rows.
- Scissors
- Tapestry needle – For weaving in ends.
- Lining (optional) – Fabric to line the inside for a professional finish.
- Handles – Either crochet your own, or use wooden, leather, or metal handles.
 Basic Info:
- Skill Level: Intermediate
- Pattern Type: Honeycomb (uses front post stitches and chains)
- Bag Style: You can adapt this for a tote, bucket bag, or handbag.
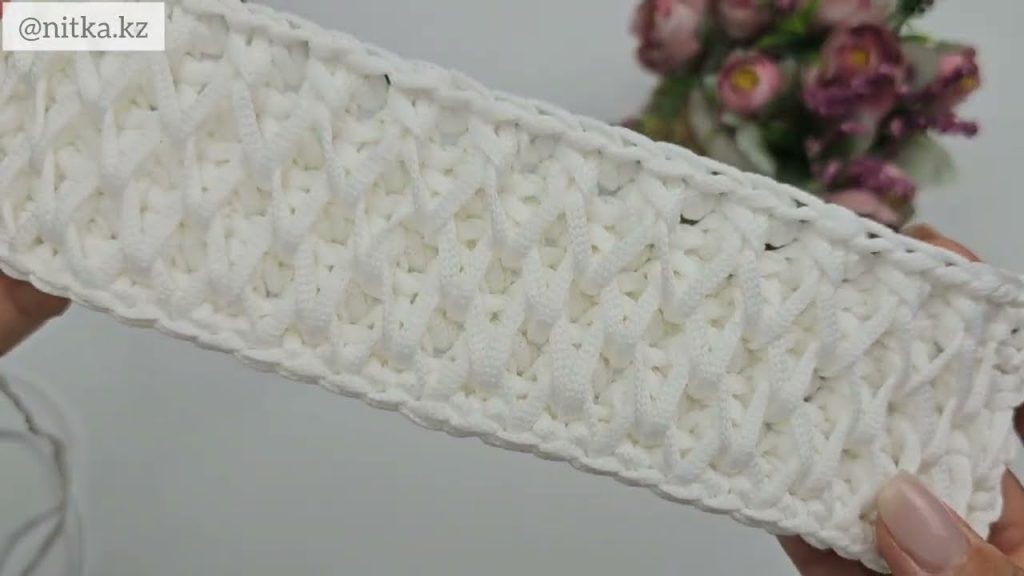
 Honeycomb Pattern Basics (Crochet Version)
The honeycomb pattern in crochet is commonly done using front post double crochet (FPDC) and chains, arranged in a staggered hexagonal layout. Here’s a simplified version suitable for bags:
Honeycomb stitch pattern (worked in the round or rows):
Row 1: *1 FPDC in next st, ch 1, skip 1* — repeat across.
Row 2: *1 FPDC around ch-1 space from previous row, ch 1, skip next FPDC* — repeat.
You’re creating hexagon-like “cells” that resemble a honeycomb. The key is to stagger the FPDC stitches over the chain spaces from the previous row.
 Step-by-Step: Crocheting the Honeycomb Bag
STEP 1: Make the Base
Choose your base style:
- Flat Oval/Rectangle for a tote or shoulder bag
- Circle for a bucket-style bag
Example: Flat Oval Base (worked in the round):
Ch 21 (or as wide as you want)
Round 1: SC in 2nd ch from hook, SC across, 3 SC in last ch. Continue on opposite side, SC across, 3 SC in last ch. Join with sl st.
Round 2–4: SC around, increasing evenly at ends to keep base flat.
You can make the base wider/longer depending on your design.
STEP 2: Start the Honeycomb Body
Now that your base is ready:
- Switch to working in rounds.
- Mark the beginning of the round.
- Begin the honeycomb pattern.
Round 1:
- FPDC around next stitch, ch 1, skip 1 st – repeat around.
- Join with sl st to top of first FPDC.
Round 2:
- FPDC around chain space (not stitch), ch 1 – repeat around.
- Join.
 Repeat these rounds until the bag reaches the desired height (usually 20–30 cm for a medium bag).
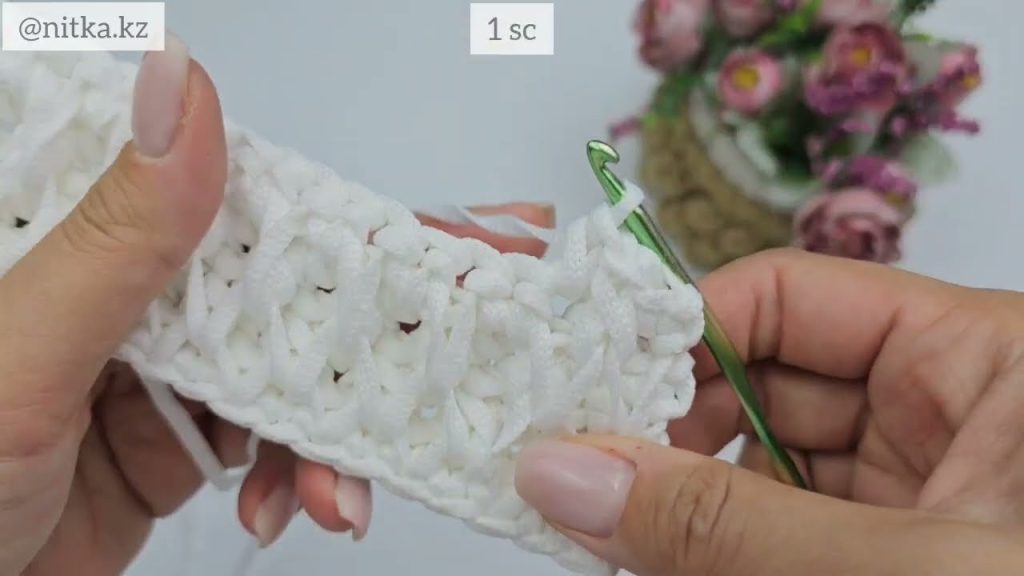
 Tip: To keep the structure strong, you can do 1–2 rounds of single crochet at the top for stability before finishing off.
STEP 3: Attach Handles
You can:
- Crochet strap handles and sew them to the bag.
- Use wooden rings or metal hardware and crochet around them.
- Attach leather straps with rivets (requires punching holes).
STEP 4: Finishing Touches
- Weave in ends using a tapestry needle.
- Add a lining (optional but recommended for durability):
- Cut fabric to size
- Sew into the inside using a hand needle or sewing machine
- Add closures if desired:
- Zipper, magnetic snaps, button, etc.
 Optional Variations
- Add a bottom panel of a contrasting color.
- Incorporate beads or charms into the honeycomb pattern.
- Make it a drawstring bag by weaving cord through top eyelets.
 Visual Inspiration
You may want to search for:
- “Crochet honeycomb stitch bag tutorial”
- “Crochet bag polyester cord honeycomb pattern”
(If you want, I can fetch some image or video references for visual aid.)
 Summary Chart
| Part | Stitches Used | Notes |
|---|---|---|
| Base | SC, Inc | Oval/round/rectangular |
| Body | FPDC, Chain | Honeycomb stitch |
| Top | SC | Stabilize top edge |
| Handles | SC or premade | Attach securely |
| Finishing | Tapestry needle | Optional lining, closure |
Watch tutorial:
Comments
Post a Comment