
Sure! Here’s a detailed step-by-step tutorial on how to make a Crochet Puff Flower Bucket Hat. This project is great for intermediate crocheters and those comfortable with making motifs and joining them. We’ll go through materials, stitches used, puff flower construction, hat assembly, and brim shaping.
 How to Make a Crochet Puff Flower Bucket Hat
(Full Tutorial for Beginners to Intermediate Crocheters)
 Materials Needed
- Yarn:
- Worsted weight or cotton yarn in multiple colors (for flowers)
- One base color for joining and brim (e.g., white or cream)
- Hook: 4.0 mm (G) or appropriate for your yarn
- Scissors
- Tapestry needle
- Measuring tape
 Stitches & Abbreviations Used
- CH – Chain
- SL ST – Slip Stitch
- SC – Single Crochet
- DC – Double Crochet
- Puff Stitch – Yarn over, insert hook, pull up loop (repeat 4 times), yarn over, pull through all loops on hook
- Magic Ring
PART 1: Making the Puff Flowers 
You will need around 18–20 puff flowers for an adult-sized hat. Adjust depending on your head size.
Puff Flower Motif Instructions
 Step 1: Center of the Flower (magic ring)
- Make a magic ring.
- CH 1, work 6 SC into the ring, SL ST to first SC to close. (6 sts)
Step 2: Petals (Puff Stitches)
- CH 2, work 1 puff stitch into the same stitch, CH 2, SL ST into the next stitch.
- Repeat around for 6 petals.
- Fasten off and weave in ends.
Repeat this in various colors for a flower garden effect.
PART 2: Joining the Flowers
 Join-As-You-Go (Recommended)
After making your flowers, you’ll join them into panels. Most bucket hats are made in this format:
- Top Circle: 1 flower in the center
- Middle Round: 6 flowers around the center
- Lower Round: 12 flowers around that
- Brim: SC/DC rows
 Layout:
     ⊙ (1)
   ○ ○ ○ ○ ○ ○  (6)
 ○ ○ ○ ○ ○ ○ ○ ○ ○ ○ ○ ○  (12)
This will give you the crown and body of the hat. Use your base color yarn to slip stitch or SC motifs together through the back loops only.
PART 3: Shaping the Hat 
Top & Body
- Once you’ve joined your motifs into a circular crown (as above), test the fit.
- Use SC or DC stitches to fill any gaps between motifs and create a more solid structure.
- You can work in continuous rounds or join each round depending on your preference.
PART 4: Creating the Brim 
 Brim Instructions (approx. 5–8 rounds)
- Attach yarn at any point on the base of your hat.
- Round 1: SC evenly around the base. Join with SL ST.
- Round 2: (SC in 2 stitches, 2 SC in next stitch) repeat around (this increases width).
- Rounds 3–6: Continue increasing every few stitches to flare out the brim.
- Optional: Switch to DC stitches for a wider brim.
Adjust brim width to preference (shorter for a classic bucket hat, wider for a sun hat style).
PART 5: Finishing Touches 
- Weave in all ends with a tapestry needle.
- Block the hat slightly to shape (wet it and form it over a bowl/head mannequin).
- Optional: Add a drawstring or lining if you want it more secure.
 Tips & Variations
 Use pastel or bold colors for a vibrant flower field look.
- Cotton yarn gives structure; acrylic is lighter but less sturdy.
- You can also add a plain SC or DC lining under the flower motifs for durability.
 Add wire to the brim edge if you want it stiff and shaped.
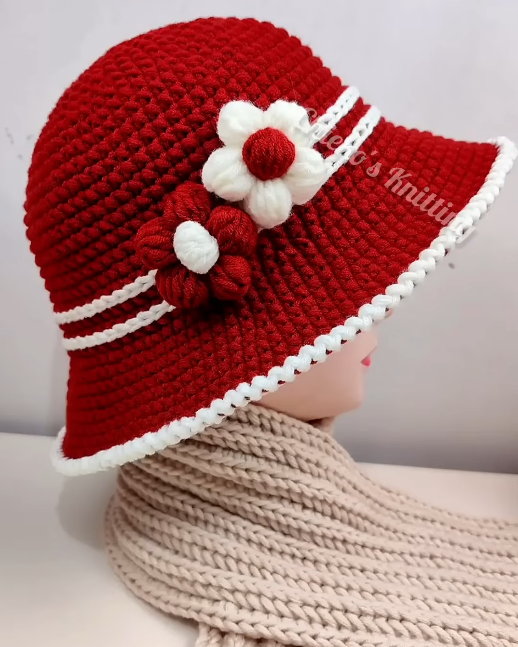
 Final Look
Your finished hat will have:
- A 3D puff flower crown (colorful and textured)
- A structured bucket shape
- A wide or narrow brim depending on your preference
Watch tutorial:
Comments
Post a Comment