Sure! Here’s a detailed, easy-to-follow guide on how to make a crochet hat using the honeycomb stitch pattern. This project is suitable for advanced beginners to intermediate crocheters, especially if you’re comfortable working in the round and using post stitches.
 How to Make a Crochet Hat with Honeycomb Stitch Pattern (EASY!)
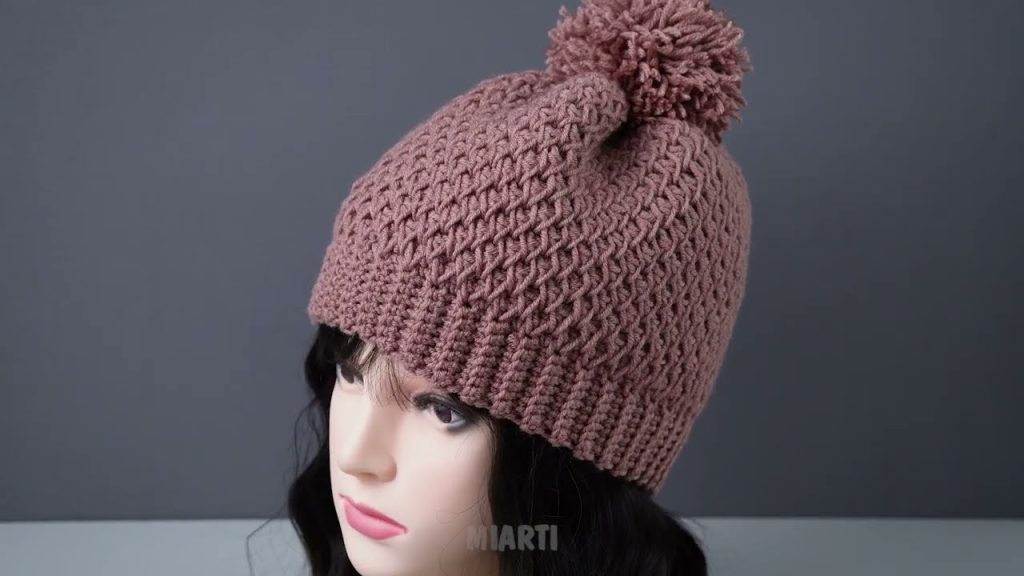
 What is the Honeycomb Stitch?
The honeycomb stitch in crochet typically uses front and back post double crochet (FPdc & BPdc) to create a textured, raised hexagonal or diamond pattern that resembles a beehive. It’s beautiful, warm, and stretchy—perfect for hats!
 Materials You’ll Need:
- Yarn: Worsted weight yarn (Category 4), about 150–200 yards
- Hook: 5.0 mm (H/8) crochet hook
- Tapestry needle (for weaving in ends)
- Scissors
- Stitch marker (optional but helpful)
 Sizing Info:
This pattern makes an adult-sized beanie (21–23″ head circumference), but you can adjust by changing the initial stitch count (must be a multiple of 6 for the honeycomb pattern to work).
 Abbreviations (US Terms):
- ch – chain
- sl st – slip stitch
- sc – single crochet
- dc – double crochet
- FPdc – front post double crochet
- BPdc – back post double crochet
- st – stitch
- rep – repeat
 Part 1: Make the Hat Brim (Optional Ribbed Band)
This is a simple sc ribbing that makes the hat fit snugly.
Ribbed Brim:
- Ch 10
- Row 1: Sc in 2nd ch from hook and each ch across. (9 sc)
- Row 2–70 (or to desired circumference):
Ch 1, turn, sc in back loops only across. (9 sc) Tip: Adjust rows to fit head snugly. - Join ends with sl st to form a band.
 Part 2: Set Up for Honeycomb Stitch Pattern
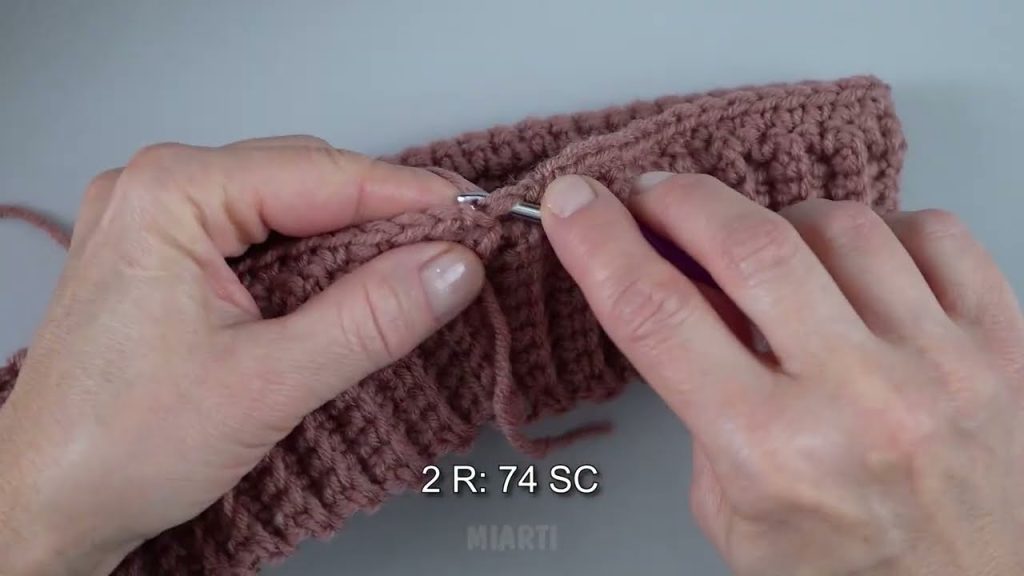
- Round 1 (Setup):
Ch 1, sc evenly around the edge of the band to make a base for your stitch pattern. Make sure the total number of sc is a multiple of 6. Sl st to join. - Round 2:
Ch 2 (does not count as st), FPdc in next 3 sts, BPdc in next 3 sts, rep * around. Sl st to join.
Part 3: Work the Honeycomb Stitch Pattern
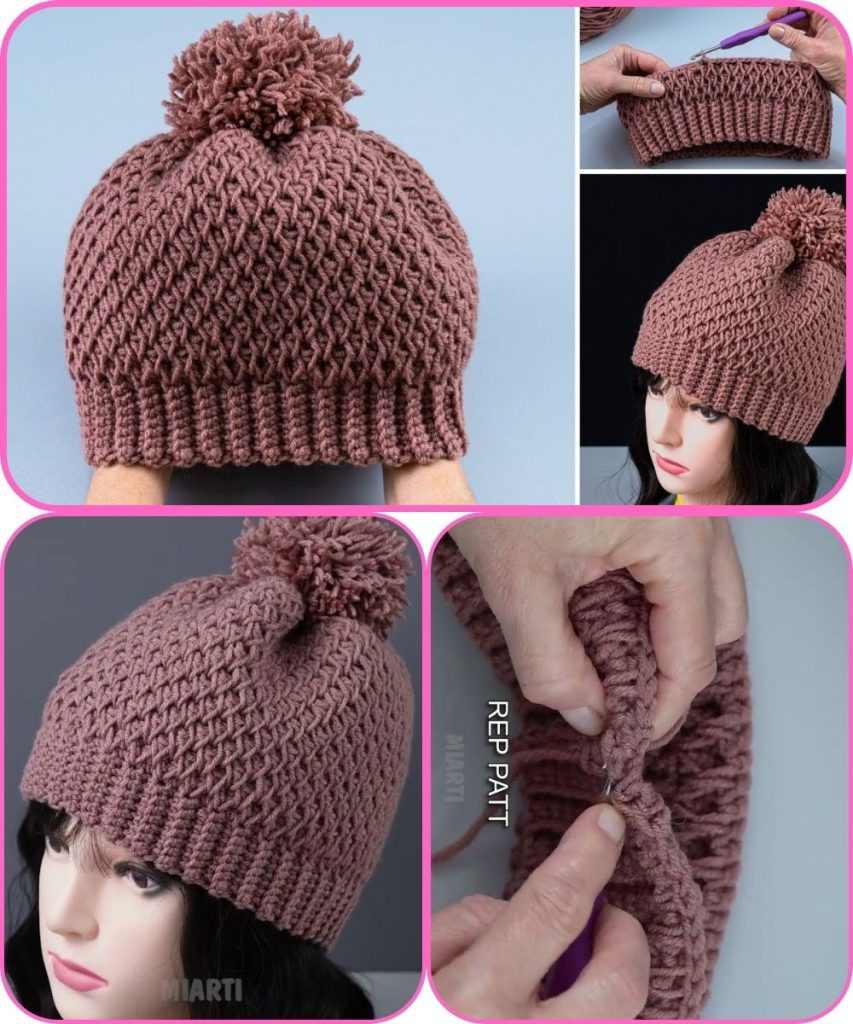
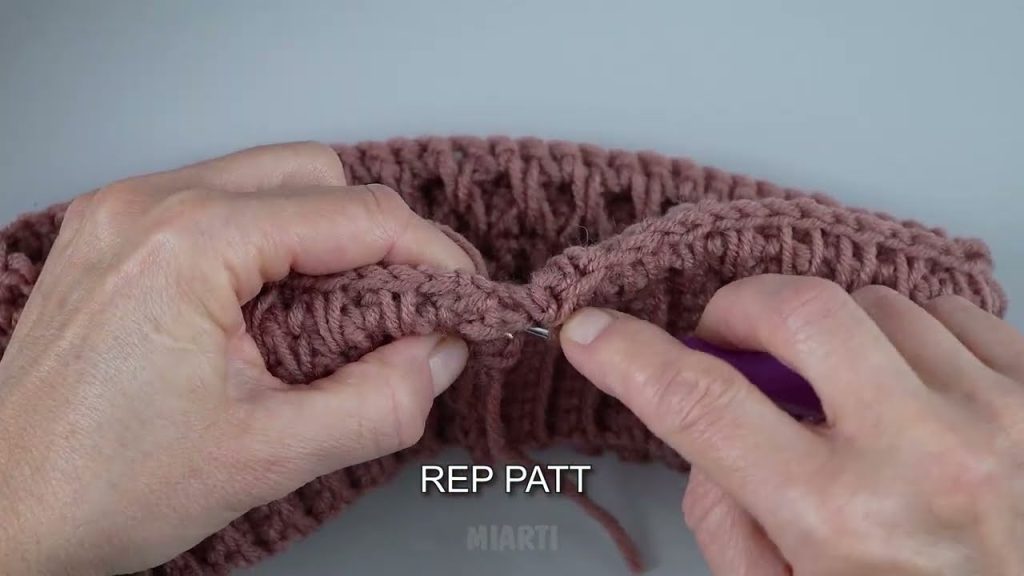
The basic honeycomb pattern alternates 3 FPdc and 3 BPdc stitches, but you shift them every 2 rounds to create the “honeycomb” effect.
Repeat the following:
- Round A: 3 FPdc, 3 BPdc around. Sl st to join.
- Round B: Repeat Round A.
- Round C: 3 BPdc, 3 FPdc around (this shifts the pattern). Sl st to join.
- Round D: Repeat Round C.
Continue repeating Rounds A–D until the hat is about 7–8 inches tall from the brim.
Part 4: Shaping the Crown (Top of the Hat)
As you reach the desired height, start decreasing to close the top of the hat.
Begin Decreases (Keep FPdc/BPdc pattern where possible):
- Round 1: [FPdc2tog over next 2 FPdc], FPdc, [BPdc2tog over next 2 BPdc], BPdc, repeat around.
- Round 2: Continue decreasing: FPdc2tog, BPdc2tog around.
Continue decreasing (switch to dc2tog if easier) until about 6–8 stitches remain.
Part 5: Finishing
- Cut yarn, leaving a long tail.
- Thread the tail through the remaining stitches and pull tight to close.
- Weave in ends.
- Add a pom-pom if desired!
 You’re Done!
You’ve just made a cozy, textured honeycomb stitch crochet hat!
 Tips for Success:
- Use a stitch marker to keep track of the beginning of each round.
- Practice FPdc and BPdc before starting if you’re new to post stitches.
- Block the finished hat lightly with steam to open up the stitch texture.
Watch tutorial:
Comments
Post a Comment