
Ads

EASY CROCHET Angel Dress-Pants Baby Set

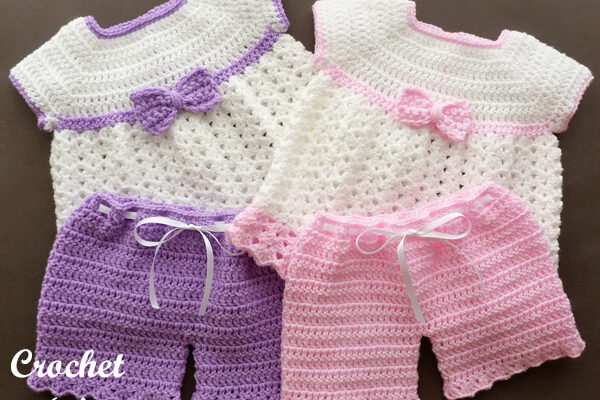
 If you’re looking for a beautiful and beginner-friendly crochet project for a little one, the Angel Dress and Pants Baby Set is a charming option. This delightful two-piece outfit is perfect for special occasions, gifts, or everyday elegance. In this detailed tutorial, you’ll learn step-by-step how to create this adorable crochet baby set with ease.


Materials Needed

  • Soft baby yarn (lightweight cotton or acrylic yarn in preferred colors)
  • Crochet hook size 3.5 mm or 4.0 mm
  • Stitch markers
  • Scissors
  • Yarn needle
  • Buttons or ribbons (optional)
  • Measuring tape

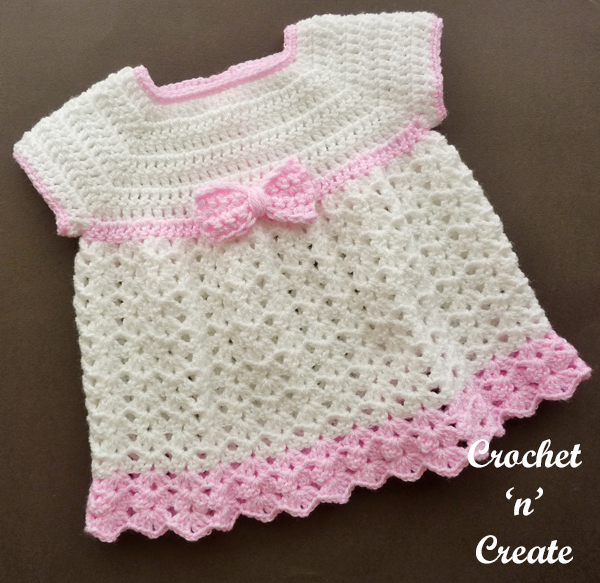
Part 1: Angel Baby Dress

Step 1: Crochet the Yoke

  1. Foundation Chain: Chain 52 (or as needed for size).
  2. Row 1: DC in 4th chain from hook and across.
  3. Row 2–6: Turn, chain 3, and DC across, placing increases at shoulder markers to form a rounded yoke.
  4. Mark Sleeves: Use stitch markers to separate front, back, and sleeves.

Step 2: Form the Armholes and Body

  1. Skip Sleeve Stitches: Chain 2–3 stitches under each armhole and join the front and back sections.
  2. Work in Rounds: Begin working in the round with a decorative stitch like shell stitch or fan stitch.
  3. Length: Continue until the dress reaches desired length (usually 10–12 inches).

Optional Skirt Embellishments

  • Add rows of lace-style stitches for a delicate look.
  • Alternate colors for a striped effect.

Part 2: Angel Baby Pants

Step 1: Create the Waistband

  1. Chain to fit baby’s waist: E.g., 60–70 chains for 0–3 months.
  2. Join in the round carefully.
  3. Ribbed Waistband: Work 4–5 rounds of half double crochet (HDC) in back loops only.

Step 2: Build the Body of the Pants

  1. Even Rounds: Work in HDC or DC around until pants measure from waist to crotch.
  2. Separate Legs: Divide the round into two equal parts. Work each leg in the round.
  3. Shaping: Decrease slightly toward the ankles for a snug fit.

Cuffs and Finishing Touches

  • Add ribbing or shell edging to the cuffs.
  • Insert ribbon or a drawstring at the waist if needed.

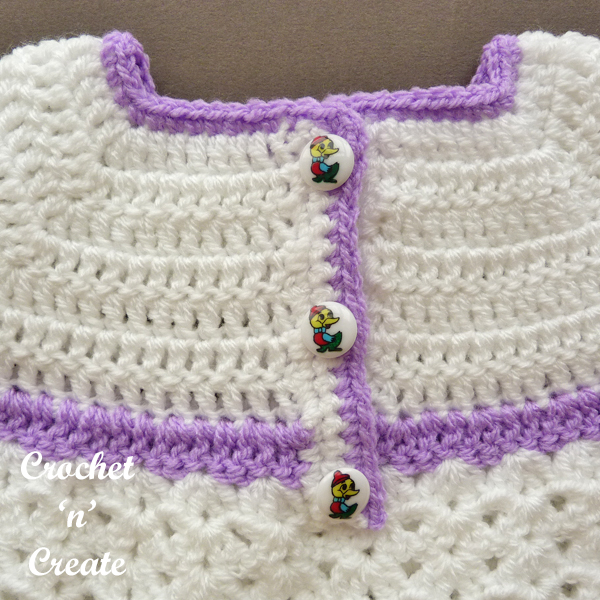
Assembly & Finishing

  • Weave in all loose ends.
  • Attach buttons or ribbons at the back of the dress for closure.
  • Lightly block the dress and pants for shape and finish.

Customization Ideas

  • Use pastel shades for a classic baby look.
  • Add small crochet flowers or appliqués.
  • Make short or long sleeves depending on the season.

Final Thoughts

This Easy Crochet Angel Dress-Pants Baby Set is a sweet and functional outfit you can make with love. With its gentle texture, thoughtful design, and beginner-friendly instructions, this handmade set is sure to be cherished. Whether you’re a new crocheter or experienced crafter, this project is a joy to complete.

Happy Crocheting!

Click here for free patterns!

Comments

Popular Posts

How to crochet a baby cardigan “Kriss Cross”

The “Criss Cross” baby cardigan is a charming and versatile crochet project suitable for various skill levels. This design features a textured crossed double crochet stitch that adds both visual interest and warmth. Below is a detailed guide to help you create this delightful piece.  Materials You’ll Need Yarn : Approximately 220–950 meters of DK (weight 3) yarn, depending on the size you choose. Crochet Hook : 4.0 mm (G) hook. Buttons : 5–7 buttons, each 15 mm in diameter. Tapestry Needle : For weaving in ends and sewing on buttons. Scissors : For cutting yarn. Baby Crochet Designs+3Ravelry+3Etsy+3 Etsy+1Ravelry+1  Available Sizes The pattern accommodates a wide range of sizes, from Preemie up to 10 years old. Specific measurements and stitch counts vary by size, so it’s essential to refer to the pattern for detailed instructions. Baby Crochet Designs+2Ravelry+2Etsy+2  Key Stitches & Techniques sc : Single Crochet dc : Double Crochet cc : Criss Cross (skip one stitch...

How to Make Simple crochet balaclava/snood/scarf

  Sure! Here’s a  detailed guide  on how to  make a simple crochet balaclava, snood, or scarf , ideal for beginners and easy to adapt depending on your style or warmth preferences.  MATERIALS NEEDED: Yarn : Medium weight yarn (Category 4) – acrylic or wool-blend for warmth Crochet hook : Size 5.0 mm (H-8) or appropriate for your yarn Scissors Yarn needle : For weaving in ends Measuring tape Stitch markers  (optional) 1.   BASIC STITCHES TO KNOW: Chain (ch) Slip stitch (sl st) Single crochet (sc) Half double crochet (hdc)  – optional Double crochet (dc)  – optional  OPTION 1: Simple  Scarf  Pattern: Foundation chain : Chain 25 (or however wide you want your scarf). Row 1 : Single crochet in the second chain from hook and across. (24 stitches) Row 2 : Ch 1, turn, sc in each stitch across. Repeat Row 2  until the scarf measures your desired length (typical scarves are 60–70 inches long). Finish off  and weave in end...

Easy Crochet Pattern: Beautiful Deni Bag Tutorial

  Here’s a detailed explanation of   how to make an easy crochet Deni bag , which you can use as a guide for creating a   video tutorial   or simply follow to make the bag yourself. The Deni bag is known for its simple construction, elegant look, and practicality. This guide will walk you through everything from materials to finishing touches.   Easy Crochet Pattern: Beautiful Deni Bag Tutorial   Overview This easy crochet bag pattern is beginner-friendly, stylish, and versatile. You’ll use basic stitches to create a sturdy rectangular base, build up the body, and finish with handles. Perfect for everyday use or as a handmade gift.   Video Tutorial Structure (for YouTube or Reels)   Intro (0:00–0:30) Show a finished Deni bag. Mention the level (Beginner-friendly). Display a list of required materials.   Materials Needed Item Description Yarn Cotton or poly-blend yarn (medium-weight, e.g. size 4) Crochet hook 4.0mm–5.0mm (check yarn label) Sci...

Ads