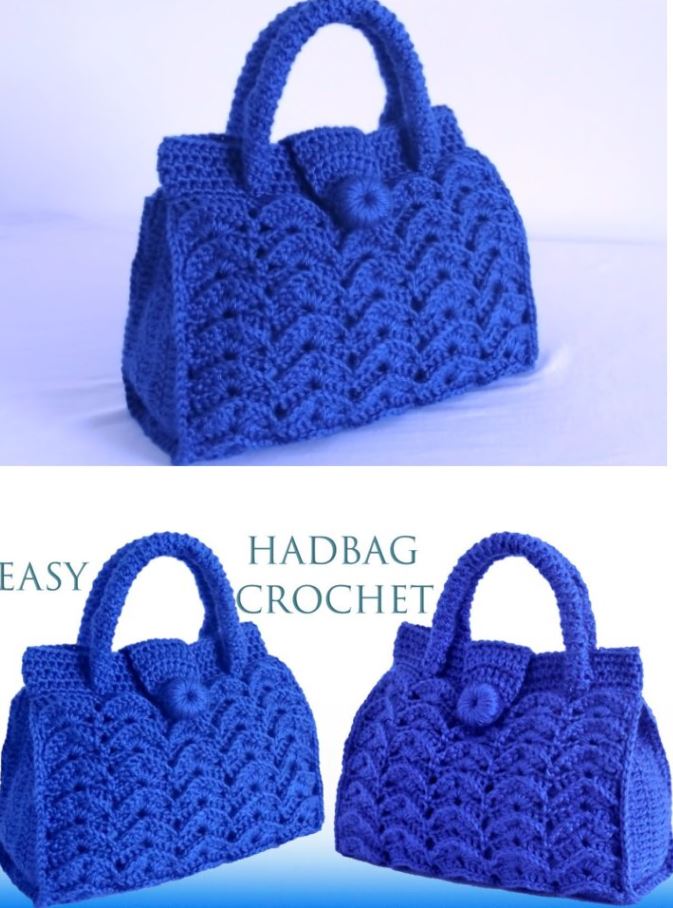
Crochet 3D embossed bags are a beautiful and functional accessory, featuring textured stitches that add depth and elegance to the design. These bags are perfect for carrying essentials while making a stylish statement. This tutorial will guide you through the process of creating an easy crochet embossed bag with a stunning 3D effect.

Materials Needed:
- Yarn: Worsted weight or bulky yarn for a sturdy bag
- Hook: Size H (5.0 mm) or I (5.5 mm) crochet hook
- Scissors
- Yarn needle
- Stitch markers (optional)
- Lining fabric (optional for added durability)
- Bag handles or crocheted straps
- Magnetic clasp, zipper, or button for closure (optional)
Step 1: Understanding the 3D Embossed Stitch
The embossed effect in crochet is achieved using front post double crochet (FPDC) and back post double crochet (BPDC), which create raised and recessed sections for a textured look.
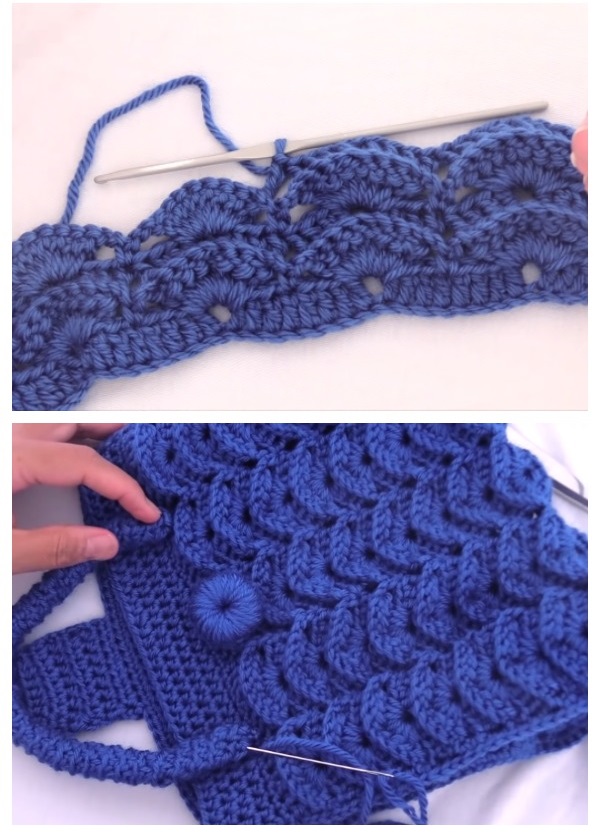
How to Crochet the Embossed Stitch:
- Foundation Row: Start with a chain of 40-50 stitches, depending on your desired bag width.
- Row 1: Double crochet (DC) in the 4th chain from the hook and in each stitch across.
- Row 2: Chain 2, turn. Work FPDC around the first DC post, then BPDC around the next DC post. Repeat across the row.
- Continue the Pattern: Alternate FPDC and BPDC in each row for the desired bag height.
The embossed effect will become more pronounced as you continue adding rows.
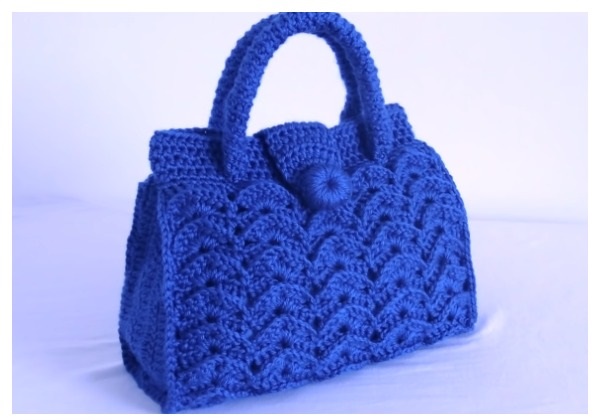
Step 2: Constructing the Bag Body
- Crochet two identical rectangular panels using the embossed stitch pattern.
- Side and Bottom Panels:
- If you want a flat bag, simply join the two panels together.
- If you prefer a structured bag, crochet a side and bottom panel using single crochet (SC) rows.
- Joining the Pieces:
- Use slip stitches or whip stitches to sew the panels together.
- Ensure that the seams are secure and reinforced for durability.
Step 3: Adding a Lining (Optional)
A fabric lining prevents stretching and gives the bag extra strength.
- Cut a fabric piece matching the size of your bag.
- Sew the edges to form a pocket.
- Attach the lining inside the bag using a sewing needle and thread.
Step 4: Adding Handles or Straps
- Crochet Handles:
- Chain 60 (adjust for desired strap length).
- Work 5-7 rows of SC for a sturdy handle.
- Attach to the bag’s sides.
- Attach Pre-Made Handles:
- Use leather, metal, or wooden handles for a professional look.
Step 5: Adding a Closure
- Magnetic Snap: Sew it inside the lining for a sleek closure.
- Zipper: Attach a zipper along the top edge for security.
- Button and Loop: Create a decorative closure with a crocheted loop and large button.
Creative Variations
- Color Combinations: Use multiple colors to highlight the embossed pattern.
- Beaded Design: Add beads between the embossed stitches for elegance.
- Mini or Large Bag: Adjust stitch count and rows for different sizes.
- Tote Style: Increase the panel size for a larger tote bag.

Final Thoughts
Crochet easy 3D embossed bags are a stylish and functional project that showcases your creativity. The textured design adds an elegant touch, making the bag a standout piece. Whether for personal use or as a handmade gift, this bag is both practical and beautiful!
Happy Crocheting!
Video tutorial:
Comments
Post a Comment