Sure! Here’s a detailed guide on how to make the perfect reticule handbag that:
- Keeps its shape well
- Is crocheted
- Includes an easy way to sew a zipper lining
 How to Make the Perfect Reticule Handbag (Crocheted, Holds Shape, with Zipper Lining)
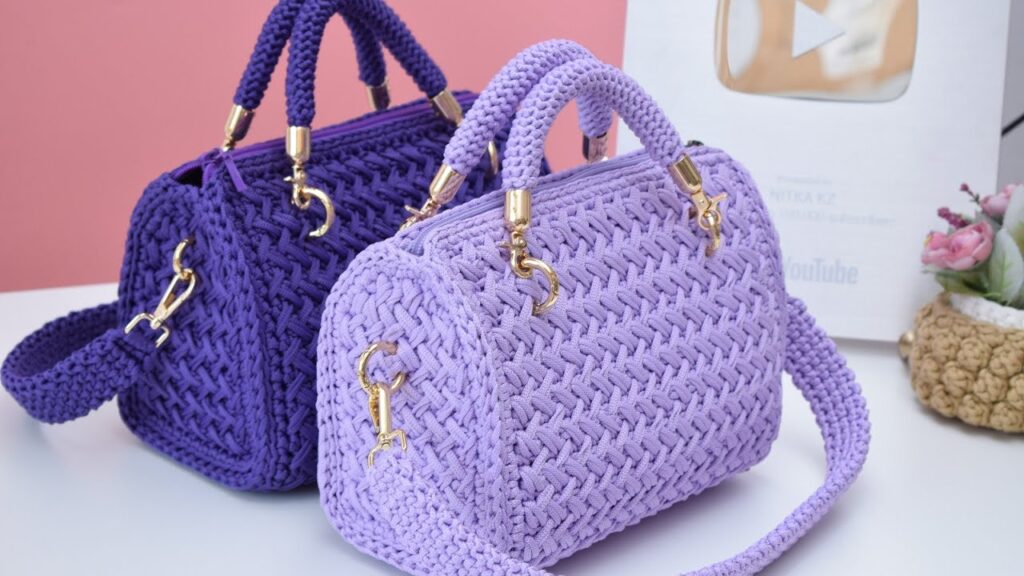
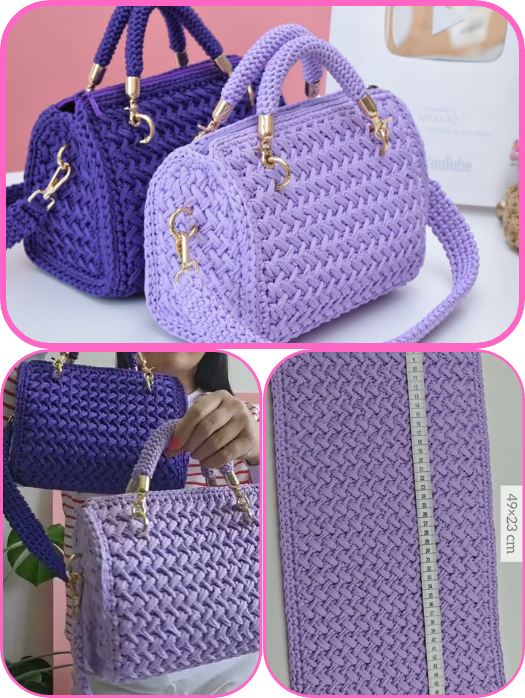
A reticule handbag is a small drawstring or zippered pouch often used for carrying essentials, and it’s a charming vintage-style accessory. This version will be modernized with structure and a zipper.
 Materials Needed:
- Worsted weight cotton yarn (for durability and structure)
- 4 mm or 4.5 mm crochet hook
- Stitch markers
- Tapestry needle
- Foam interfacing or plastic canvas (optional but helps with shape)
- Zipper (7–9 inches) (adjust to bag size)
- Fabric for lining (cotton or poly-cotton)
- Sewing thread & needle or sewing machine
- Scissors
- Pins or fabric clips
 Step 1: Crochet the Base and Body
 1.1. Base (Circle or Oval)
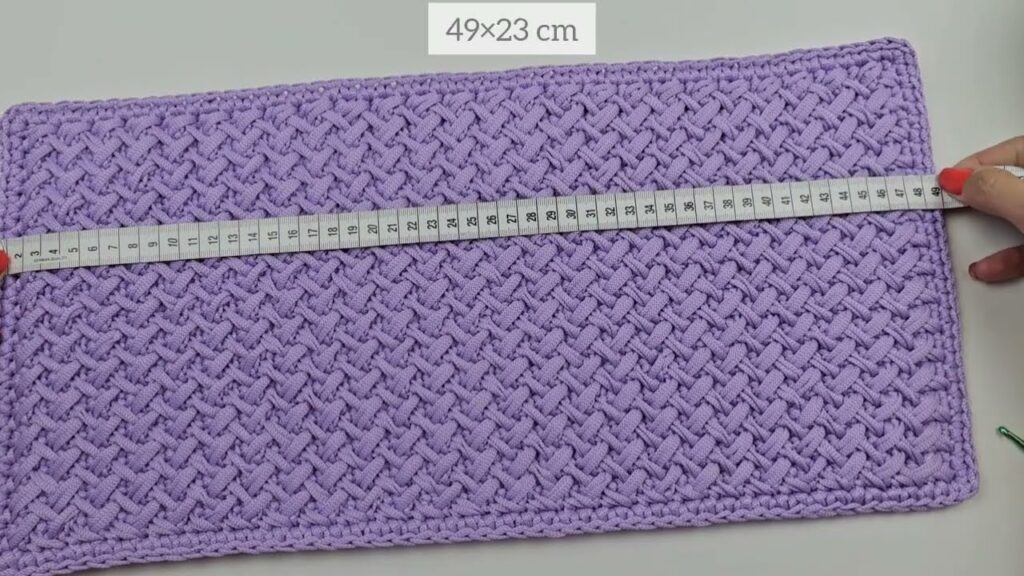
Choose a base shape. A flat circle gives a pouch look; a rectangular base gives more structure.
Flat Circular Base:
Round 1: Magic ring, ch 1, 6 sc into ring (6)
Round 2: 2 sc in each st around (12)
Round 3: (1 sc, inc) repeat around (18)
Round 4: (2 sc, inc) repeat around (24)
...continue increasing until desired diameter (e.g. 5-6 inches)
1.2. Body of Bag
Once the base is the size you want, stop increasing and start working in even rounds.
Rounds X-Y: Sc in each stitch around until the body is the desired height (6-8 inches).
Use stitch markers to track your rounds.
Optional: You can use alternating sc and dc to create texture. Or work in front/back post stitches for structure.

 Step 2: Reinforce the Structure
To help the bag keep its shape, insert a structural layer:
- Option 1: Foam interfacing (fusible or sew-in) – sew it to the lining fabric.
- Option 2: Plastic canvas cut to size – slip it between crochet and lining.
- Option 3: Crochet with two strands held together (yarn + cotton thread) to add stiffness.
 Step 3: Make the Fabric Lining
 3.1 Cut Fabric
Cut a piece of fabric slightly smaller than your crocheted bag (allow for seams).
Example:
If your bag is 8” wide and 7” tall:
- Cut 2 rectangles: 7.5” x 6.5”
- Round the bottom corners or match the shape of your crocheted base.
3.2 Sew Zipper to Lining
- Place the zipper face down on the top edge of one fabric piece.
- Stitch using a zipper foot or by hand.
- Repeat for the other side of the zipper with the second fabric panel.
Once zipper is attached, sew the bottom and side edges of the lining (right sides together). Leave zipper open before turning.
 Step 4: Attach Lining + Zipper to Crocheted Bag
- Turn the fabric lining right side out.
- Insert it into the crocheted bag (wrong sides touching).
- Align the zipper edge with the top of the crocheted bag.
- Use clips or pins to hold everything in place.
4.1 Hand-Sew or Machine-Sew Zipper
- With a tapestry needle and matching thread/yarn, sew around the edge through the crochet and the zipper tape.
- Use whipstitch or blanket stitch for a neat look.
- Make sure stitches are tight and secure.
 Optional Additions:
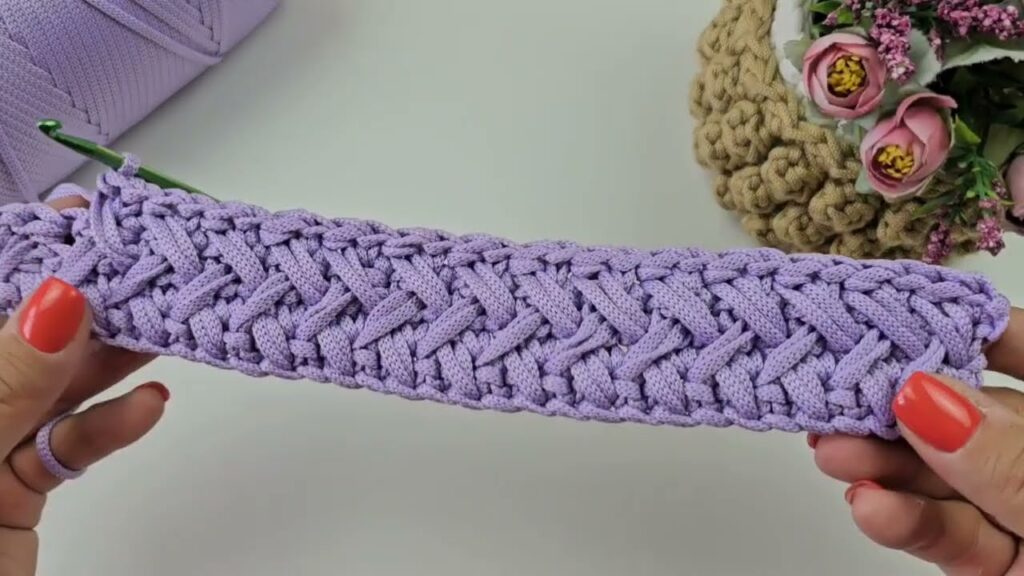
- Add a crocheted handle or wrist strap.
- Attach tassels or a decorative drawstring for a vintage feel.
- Sew in interior pockets in the lining if desired.
 Final Touches:
- Check the zipper works smoothly.
- Make sure the lining is snug and doesn’t sag.
- Block the finished bag gently with steam or a damp cloth to shape it.
Summary Checklist:
| Task | Done? |
|---|---|
| Crochet base and body | |
| Add interfacing or structure | |
| Cut and sew fabric lining | |
| Attach zipper to lining | |
| Sew lining and zipper to crochet | |
| Add optional straps or details |
Watch video:
Comments
Post a Comment