.jpg)
Here’s a detailed guide on how to make a comfortable and beautiful cylinder handbag, including materials, step-by-step instructions, design tips, and customization ideas. This project is great for beginners and intermediate crafters.
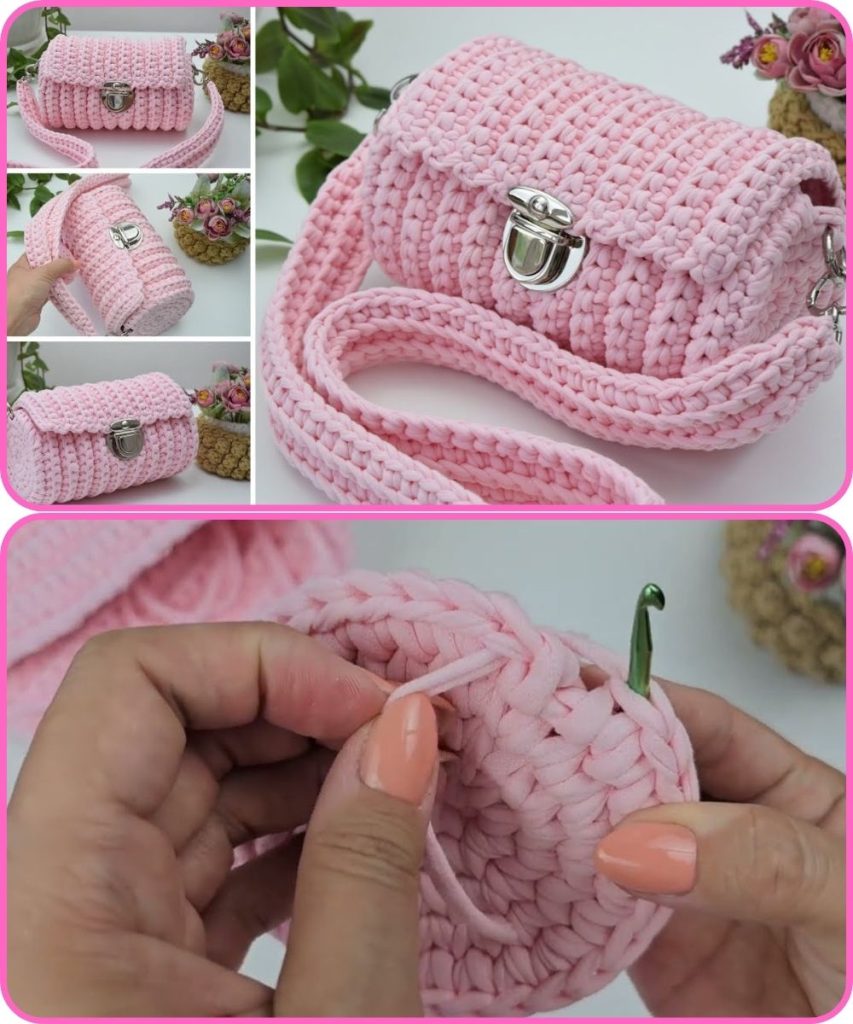
 How to Make a Comfortable and Beautiful Cylinder Handbag
 Overview:
A cylinder handbag (also called a barrel bag) is a cylindrical-shaped bag that’s trendy, functional, and relatively easy to make. With the right materials and techniques, you can create a bag that’s both stylish and comfortable to carry.
 Materials Needed:
| Item | Description / Suggestions |
|---|---|
| Fabric (outer) | Sturdy cotton, denim, canvas, faux leather, or suede |
| Fabric (lining) | Lightweight cotton or polyester |
| Interfacing | Medium-weight fusible (for structure) |
| Zipper | 12″ to 16″ long (metal or plastic, depending on the size) |
| Straps | Leather, webbing, or fabric straps |
| Thread | Heavy-duty thread for durability |
| Sewing machine | With needle suited for thick fabric |
| Scissors/rotary cutter | For cutting fabric |
| Measuring tape/ruler | |
| Pins/clips | |
| Optional: rivets, decorative stitching, patches, inner pocket zipper, tassels |
 Bag Dimensions (Example):
You can adjust based on your desired size. A standard cylinder bag might be:
- Length (body): 12 inches
- Diameter (circular ends): 6 inches
This will give you a medium-sized handbag.
 Step-by-Step Instructions:
1. Cut the Fabric
Cut the following pieces:
- Outer Fabric:
- 1 rectangle: 12″ x 18″ (main body)
- 2 circles: 6″ diameter (sides)
- Lining Fabric:
- 1 rectangle: 12″ x 18″
- 2 circles: 6″ diameter
- Interfacing:
- Same size as above pieces (for structure)
 Tip: Use a compass or plate to draw perfect circles.
2. Apply Interfacing
- Fuse interfacing to the wrong side of outer fabric and lining pieces using an iron.
- This gives structure to the bag and helps it hold its shape.
3. Add Zipper
- Fold the long side of the outer fabric rectangle in half (lengthwise) to find the center.
- Place the zipper face-down along one long edge of the outer fabric.
- Pin and stitch using a zipper foot.
- Do the same for the other side of the zipper with the other edge of the fabric.
- Repeat the same with the lining fabric (optional: attach zipper between outer and lining for a clean finish).
Pro Tip: Topstitch around the zipper for a neat and professional look.
4. Assemble the Cylinder
- With right sides together, sew the short edges of the main rectangle to form a tube.
- Pin one circular end to the tube’s edge (right sides together). Carefully sew around the circle.
- Repeat on the other side.
- Do this for the outer fabric first, then repeat for the lining—but leave a 4” gap in the lining for turning the bag inside out.
5. Insert Straps or Handles
- Cut straps to desired length (e.g., 20″ for hand carry, 45″ for crossbody).
- Attach straps to the sides of the bag (on the main outer body, not circles), sewing them securely with a box stitch or use rivets for extra strength.
6. Turn and Finish
- Turn the entire bag right-side out through the opening in the lining.
- Stitch the lining opening closed by hand or machine.
- Push the lining into the bag and straighten the edges.
 Design & Customization Ideas:
| Feature | Options |
|---|---|
| Color scheme | Earth tones, pastels, bold prints, or monochrome |
| Straps | Leather, cotton webbing, chain, or fabric tubes |
| Embroidery / Patch | Monogram, floral, logo, iron-on patch |
| Pockets | Add zippered or slip pockets inside or outside |
| Decorations | Tassels, studs, buttons, charms |
| Fabric Texture | Try quilted, woven, or faux crocodile for a luxe look |
 Comfort Tips:
- Use padded or rounded straps for shoulder comfort.
- Keep the weight light by choosing lighter fabrics.
- Line with soft cotton to make the interior gentle on hands.
- Consider adding a removable shoulder pad if making a larger version.
 Maintenance Tip:
- Use washable materials (or Scotchgard spray for protection).
- For faux leather: wipe clean with a damp cloth.
- For cotton: spot clean or machine wash (if unstructured).
 Final Thoughts:
Making a cylinder handbag lets you combine structure and creativity. Once you master the basic construction, you can scale the size, modify the straps, or add features like an adjustable strap, bottom feet, or contrast piping for flair.
Watch tutorial:
Comments
Post a Comment