Sure! Here’s a detailed step-by-step guide on how to crochet a beautiful frock (dress) for a girl, suitable for beginners to intermediate crocheters. You can customize the size, color, and pattern as needed.
 How to Crochet a Beautiful Frock for a Girl – Step-by-Step Guide
 Materials Needed:
- Yarn – Choose soft, baby-friendly yarn like:
- Cotton or acrylic blend
- Medium (worsted) weight for a warmer dress
- Lightweight (sport or DK) for a summer dress
- Crochet Hook – Size recommended on your yarn label (commonly 3.5 mm – 5.0 mm)
- Scissors
- Measuring tape
- Tapestry needle for weaving in ends
- Buttons/ribbon for closure or decoration (optional)
- Stitch markers (optional, but helpful)
 Dress Size Guide (Chest Circumference):
| Age | Chest | Length |
|---|---|---|
| 1 year | 18″ | 15″ |
| 2 years | 20″ | 17″ |
| 3–4 years | 22″ | 19″ |
| 5–6 years | 24″ | 21″ |
 Pattern Overview:
We’ll use the top-down method (yoke first, then skirt), which is easy to fit and adjust.
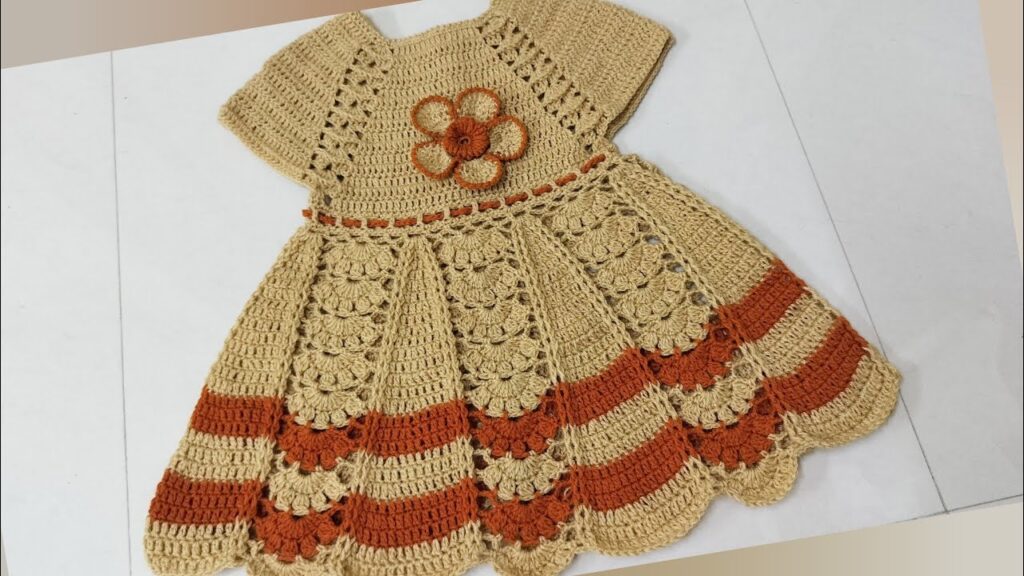
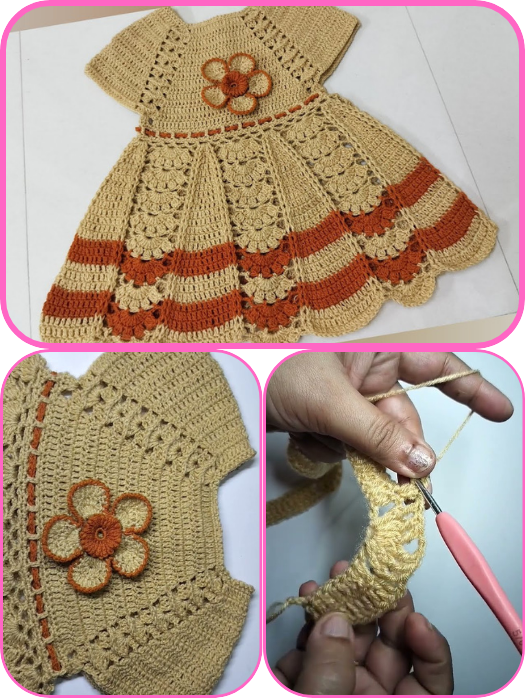
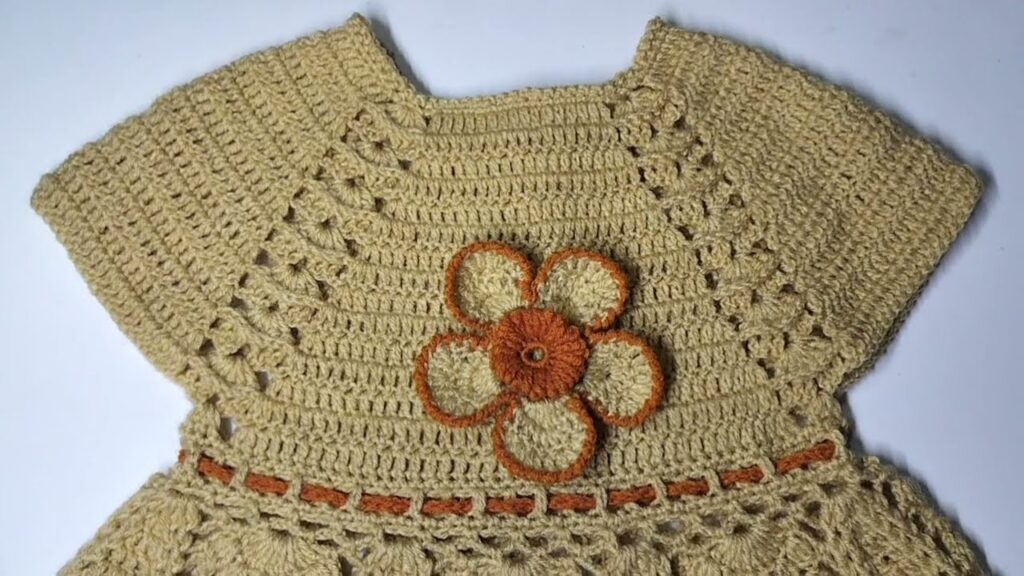
 Step 1: Crochet the Yoke (Bodice)
Stitches used:
- Chain (ch)
- Double crochet (dc) or Half double crochet (hdc)
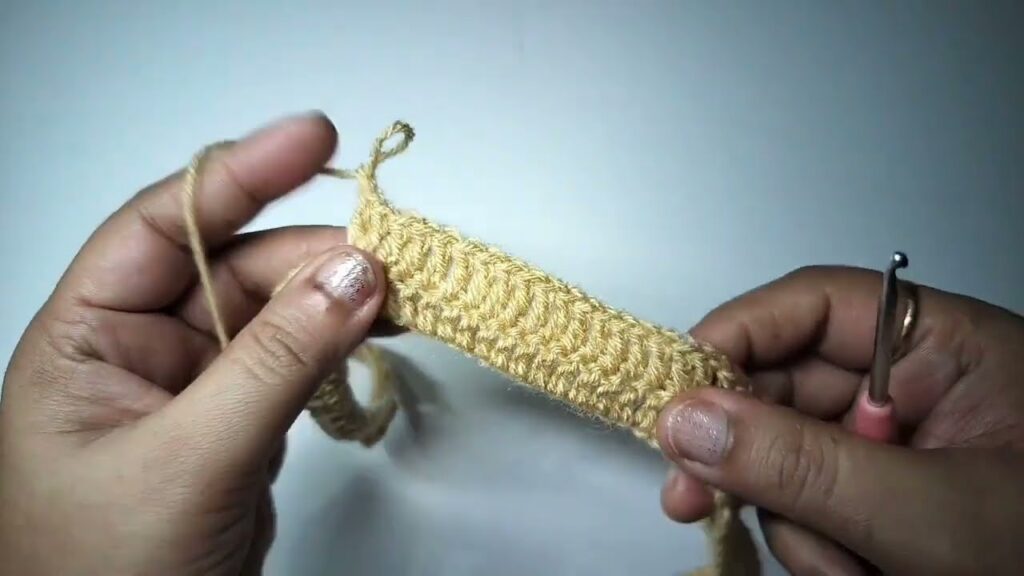
- Foundation Chain
Start with a chain that fits around the neckline (typically 48–64 chains depending on size). - Round 1 (Yoke Start):
Dc in 3rd chain from hook, and continue with dc across.
Place markers at the 4 corners where increases will be made (front, back, two sleeves). - Increase Rounds:
At each corner, work (dc, ch 1, dc) to form raglan-style increases.
Continue for 8–12 rows until the yoke reaches the underarm level. - Separate for Sleeves:
Skip sleeve stitches and continue working in rounds or rows for the body.
 Step 2: Crochet the Skirt
- Join in the round (or continue in rows if you prefer back opening).
- Increase evenly around the first row to give the skirt a flared or ruffled shape.
- Pattern Option:
- Plain dc or hdc rows
- Shell stitch or lace pattern for beauty
- V-stitch for lightness
- Length:
Work until you reach the desired dress length (e.g., 15–21 inches total from shoulder).
 Step 3: Add Details and Finish
- Hem:
Add a decorative border (picot, scallop, shell). - Neckline & Sleeves:
- Add a round of sc or decorative stitch
- Optional cap sleeves or puff sleeves
- Closure:
- Add buttonholes at the back (chain loops)
- Sew buttons or attach a ribbon tie
- Weave in all ends using tapestry needle.
 Optional Embellishments:
- Small crochet flowers, bows, or hearts
- Ribbon waist belt
- Contrasting color stripes
- Beads (securely stitched)
 Basic Shell Stitch for Skirt (Optional)
Shell stitch: (5 dc in one stitch, skip 2, sc in next stitch, skip 2, repeat)
Row 1: *5 dc in same stitch (shell), skip 2, sc in next stitch*, repeat.
 Tips for Success:
- Try the dress on as you go if possible
- Block your finished dress gently for best shape
- Use a pattern from Ravelry or YouTube if you need visual aid
Watch video:
Comments
Post a Comment