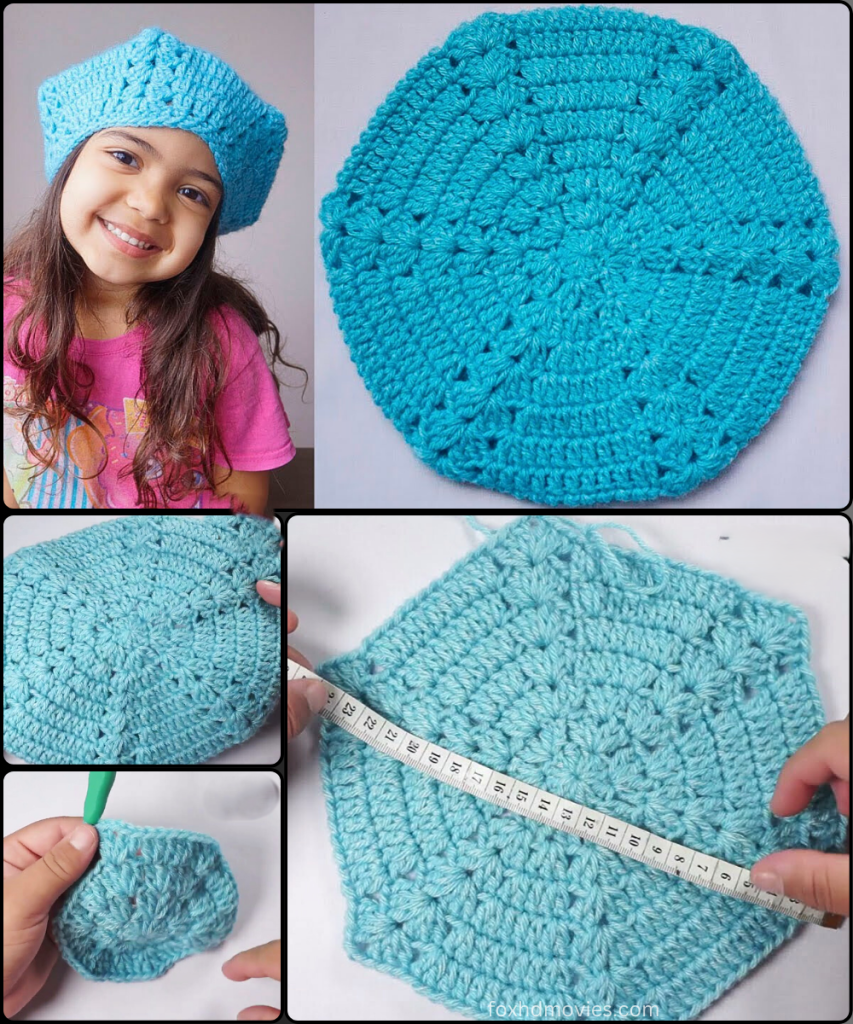
Create your own beautiful and stylish hat with this timeless crochet pattern! Inspired by a detailed tutorial, this design guides you through crafting a classic French beret, a perfect accessory for any season. With instructions to adjust the size for babies, children, and adults, this is a fantastic project for a crocheter who wants to make a personalized accessory with a touch of European flair.
Skill Level: Intermediate (familiarity with increasing and decreasing stitches recommended)
Finished Size (Approximate):
- Varies based on the number of increases and rounds.
- Babies: 7 inches (18 cm) in diameter.
- Children: 8.2-8.6 inches (21-22 cm) in diameter. This is the size shown in the video.
- Adults: 9.4-9.8 inches (24-25 cm) in diameter.
- Size can vary based on yarn, hook, and tension.
Materials You’ll Need:
- Yarn: Approximately 70g of a soft, thin yarn.
- The video uses a specific yarn type, but any yarn of a similar weight would be ideal.
- Crochet Hook: A 4.5 mm crochet hook (or a hook size appropriate for your chosen yarn).
- Tapestry Needle: For weaving in ends.
- Scissors
- Stitch Marker (Optional): To mark the beginning of rounds or specific stitches.
Gauge (Crucial for Sizing!):
Achieving consistent gauge for the base of the beret is crucial to ensure it fits correctly. Work a swatch to ensure your stitches are not too loose or too tight. If your fabric is too loose, go down a hook size.
Abbreviations (US Crochet Terms):
- ch: chain
- sl st: slip stitch
- dc: double crochet
- dc2tog: double crochet two together (a decrease)
- st(s): stitch(es)
- MR: Magic Ring
- FO: Fasten off
Let’s Crochet Your French Beret!
This beret is constructed by first crocheting a flat circular base with increases, then working a few rounds without increases, and finally a few rounds of decreases to form the top and a band to form the brim.
Part 1: The Beret Base & Increases
The base of the beret is a simple circular piece worked in rounds of double crochet. The number of increases will determine the size of your beret.
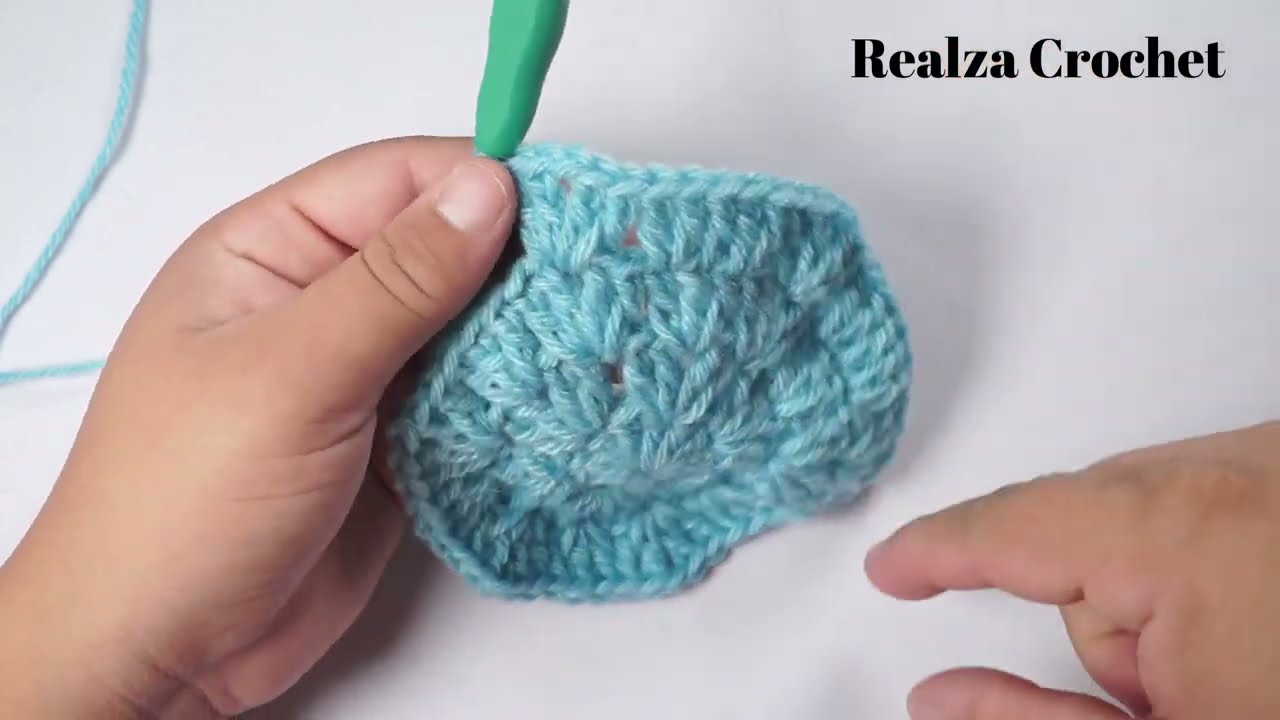
- Start: Create a Magic Ring (MR). Ch 3 (counts as 1 dc). Work 11 dc into the MR. Join with a sl st to the top of the initial ch 3. (12 dc)
- Round 2: Ch 3. 2 dc in each st around. Join with a sl st to the top of the initial ch 3. (24 dc)
- Round 3: Ch 3. 2 dc in the next st, 1 dc in the next st. Repeat from * to * around. Join with a sl st. (36 dc)
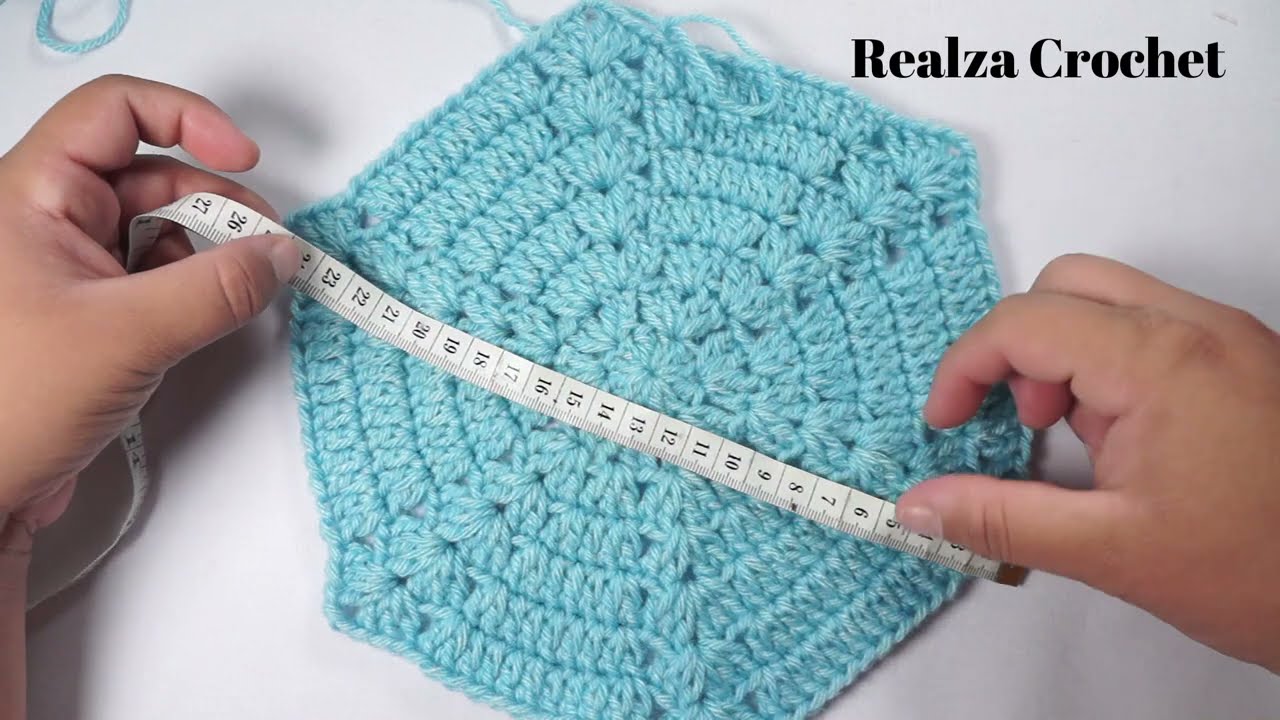
- Round 4 & Beyond: Continue to increase evenly in each round until your circle reaches the desired diameter for your size (e.g., 8.2-8.6 inches or 21-22 cm for a child’s size). The video provides a clear guide on how to increase in each round.
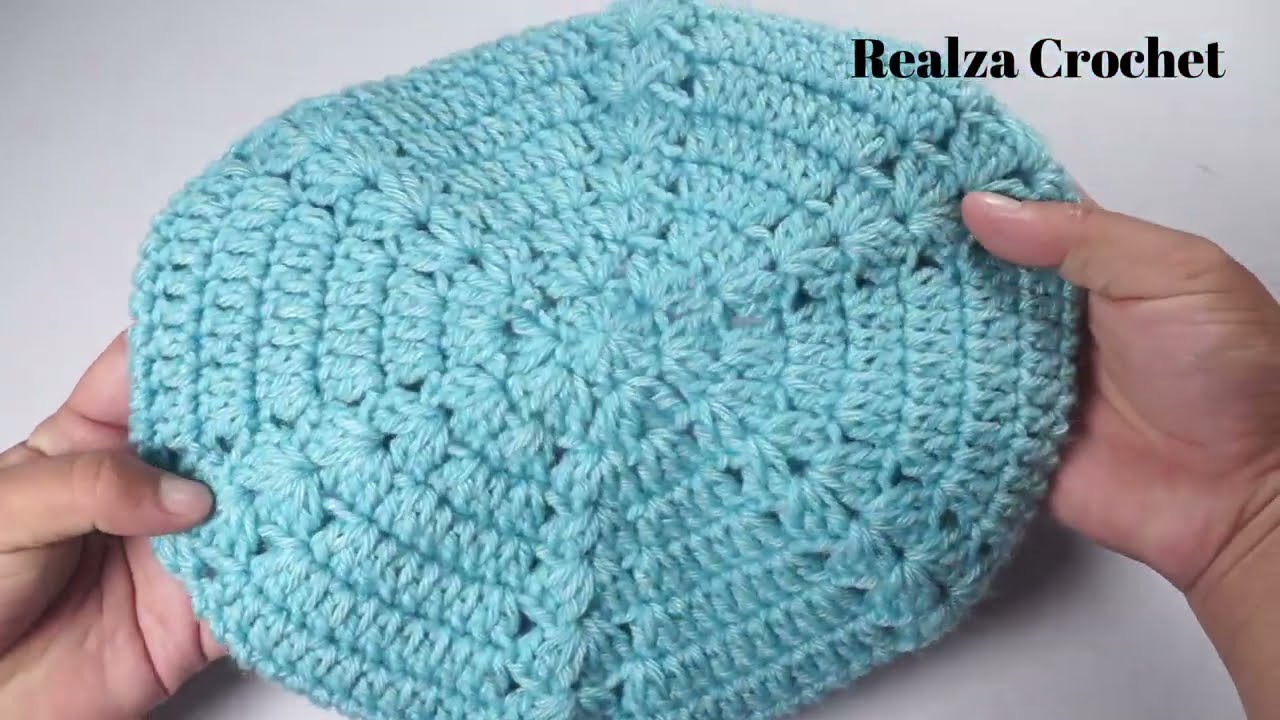
Part 2: The Beret Body (No Increases)
Once your base is the desired size, you will begin working rounds without increases to create the “sides” of the beret.
- Work even rounds: Ch 3. Dc in each st around. Join with a sl st.
- Continue: Work several rounds in this manner until the beret starts to slouch and has the desired height (e.g., 18-20 cm).
Part 3: Decreases & The Brim
- Start Decreasing: Once the beret has the desired height, the video shows how to start decreasing stitches to create the top.
- Decrease Round 1: Ch 2. Dc in the next 10 sts, dc2tog. Repeat from * to * around. Join with a sl st.
- Decrease Round 2: Ch 2. Dc in the next 9 sts, dc2tog. Repeat from * to * around. Join with a sl st.
- Continue Decreasing: Continue decreasing in this manner until the top of the beret is the desired size. The video provides a clear guide on how to decrease.
- The Brim: The video shows how to create a two-round border of single crochet stitches to create the elastic band for the brim of the beret. This will give the beret a snug fit.
Part 4: Finishing
- Weave in all ends: Use your tapestry needle to neatly weave in any remaining loose yarn tails.
Comments
Post a Comment