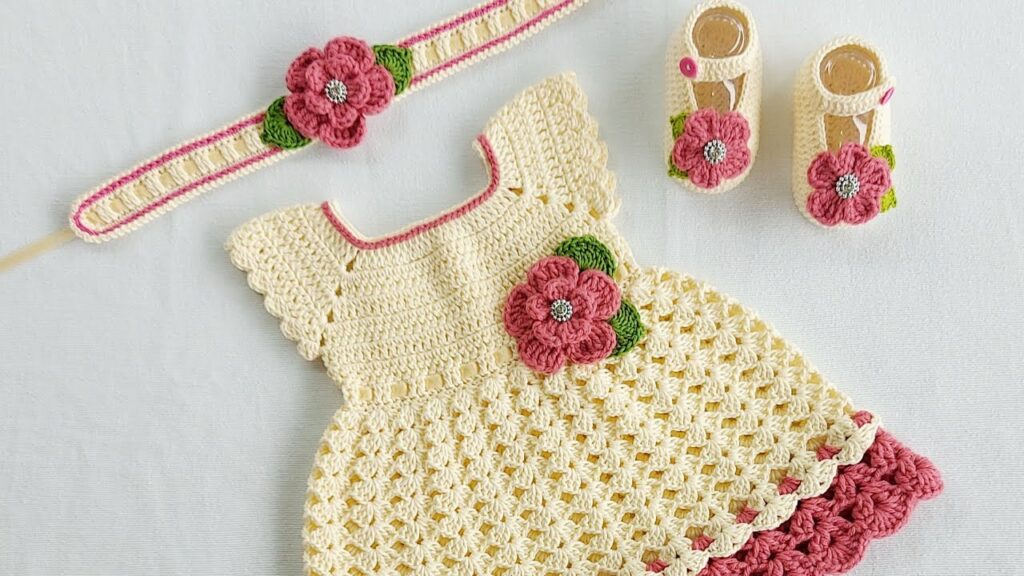
Here is a detailed guide on How to Make an Angelic Crochet Dress for a Baby Girl (0 to 3 Months Size) – made simple and easy for beginners! 

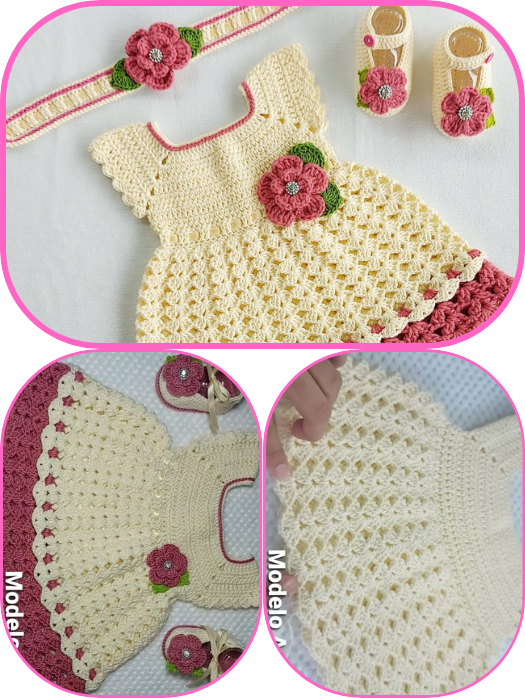
Angelic Baby Dress (0–3 Months) – Easy Crochet Pattern
 Size:
Size:
0 to 3 months – fits chest size approx. 14–16 inches (36–40 cm)
Length: approx. 11–12 inches (28–30 cm)
 MATERIALS:
- Yarn: Soft baby yarn (lightweight, category 3 or DK yarn) – around 100–150 grams
- Recommended: Cotton or baby acrylic yarn
- Hook: Crochet hook size 3.5 mm (E-4) or 4.0 mm (G-6)
- Buttons (2-3 small ones for the back)
- Tapestry needle for sewing in ends
- Scissors
 STITCHES USED:
- CH – Chain
- SC – Single Crochet
- DC – Double Crochet
- SL ST – Slip Stitch
- V-Stitch – (DC, CH 1, DC) in the same stitch
- Shell Stitch – (5 DC in one stitch)
 CONSTRUCTION OVERVIEW:
This dress is made top-down (starting from the yoke), in a round, and then expanded into the skirt.
PATTERN INSTRUCTIONS:
STEP 1: YOKE
- Start with a foundation chain:
Chain 52
(This will be your neck opening and should measure approx. 5.5–6 inches.) - Row 1:
DC in the 4th CH from the hook and in each CH across (you should have 50 DC total).
CH 2, turn. - Row 2 to 6 – Create raglan increases:
Divide as follows:- 8 DC for front
- 1 CH space for sleeve separation
- 8 DC for sleeve
- 1 CH space
- 16 DC for back
- 1 CH space
- 8 DC for other sleeve
- 1 CH space
- 8 DC for front
- At the end of Row 6, you should have a yoke wide enough to separate for sleeves.
STEP 2: SEPARATE FOR SLEEVES
- CH 2, turn.
DC across front, skip the stitches for sleeves, CH 4 (for armhole), DC across back, CH 4, DC across other front. (Now you’re working the body in the round.)
STEP 3: SKIRT SECTION
- Switch to shell stitch pattern for a frilly angelic look:
- Start the next row with: (SK 2 ST, 5 DC in next ST, SK 2 ST, SC in next ST) – repeat around.
- Continue the shell pattern for about 20–25 rows or until the dress is approx. 11–12 inches long.
STEP 4: FINISHING
- Edging: Add SC or a decorative shell border to the sleeves and neckline.
- Back closure:
- Leave a slit on the back from the neckline down to the yoke (about 2–3 inches).
- Attach 2–3 small buttons and create button loops with CH stitches.
- Weave in ends neatly with your tapestry needle.
 OPTIONAL DECORATIONS:
- Add ribbon at the waist
- Crochet tiny flowers or bows
- Use contrasting color for borders
TIPS:
- Always check your gauge if you’re unsure of size
- Use stitch markers to keep raglan increases clear
- Wash the yarn or garment in baby-friendly detergent
Watch video:
Comments
Post a Comment